When I first learned how to hand milk a cow, I honestly thought it would be easier than it was! I thought, “How hard can it be?! All you have to do is squeeze right?”, 10 years and a few milk cows later, I now know that there is a little more to it than just squeezing and, as simple of a task as it is, it does take some time to learn how to effectively hand milk a cow.

I vaguely remember my first weeks of owning a milk cow and learning to hand milk as tedious and awkward. I didn’t realize how much of a coordination activity hand milking would actually be. Sure my hands were sore, and it took some time to figure out the technique of milking, but training my brain to get the milk into the bucket, and milk 2 teats at once, that was something I didn’t expect!
It took a few weeks, and a very patient cow, but eventually I had it down pat and though I wasn’t a super speed milker, I could hand milk my cow out in 40 min or less. Over time I got faster and faster and eventually I stopped thinking of hand milking as difficult.
Hand milking vs. Machine milking
Over the years we have hand milked, as well as machine milked our cows and both have their benefits and downsides.
Advantages of hand milking a cow
- Low tech– other than a few buckets you really don’t need much as far as supplies go to hand milk a cow.
- Cost effective– milking machines can be expensive. Its not as simple as just buying the cheapest machine on the market. Some of the cheaper milking machines are missing a pulsator which is a necessary part of any milking machine. A machine without a pulsator can damage your cows teats. For this reason, if a machine with a pulsator is not in the budget, hand milking should be your go to to keep your cows teats in good condition.
- Great for cows with good hand milking teats– This is a must when picking a cow for hand milking. You want to make sure that they have teats that will be good for hand milking. Teats that are too short, or too fat will be very hard on your hands and wrists to milk. Cows with good hand milking teats make hand milking easy and in my opinion… fun!
- Enjoyable– Most of the time! Like anything there are days when I wish I could just hook a machine up and sit there, but for the most part I enjoy hand milking. Its a welcome task in my day that I look forward to.
Disadvantages of hand milking a cow
- Hard at first– It takes awhile to learn how to milk a cow by hand, but after a few weeks of milking, it gets easier.
- Can be hard on your body– Using proper milking technique and choosing milk cows that have good hand milking teats will make the process relatively easy on your body, but you do have to be cognizant if you struggle with carpal tunnel, back, neck or hand and arm issues. I have heard from people that physically can not hand milk, it is detrimental to their health to do so. Milking machines are a great option for these people.
- Time consuming– When you first start learning how to hand milk it takes a lot of time. Depending on your cow and skill level, you can expect that it will take at least an hour each milking in those first few weeks. As time goes on, your cow will become more used to you, let down easier, you learn how to milk more effectively and eventually it will probably take you about 15-20min to milk.
- Open milking system– Hand milking is classified as something called an “open milking system” meaning instead of a machine where the milk goes directly from the teats into a closed bucket, the hand bucket is open and exposed environment. Potentially this opens your milk up to more outside contamination, though by using good milking handling practices and straining your milk after milking, you mitigate the risk significantly.
Buying a cow that is suitable for hand milking
It is important that if you plan on hand milking your cow, you choose a cow that is suitable for hand milking. I can’t understate the importance of this! Choosing a cow that has tiny teats will be incredibly discouraging and can actually be really hard on your body.
Tips for buying cows to hand milk
Choose cows with long teats– A good hand milking cow will have long teats that you can easily grasp with your full hand. Teats that only hold a few fingers, will be difficult to milk.
Choose cows with slender teats– Teats that are too fat or even look “blown” will be hard on your wrists to milk.
Ask if the cow has been hand milked before– Though this isn’t a deal breaker if they have’t, it is helpful to know if your cow has been hand milked before, or if they have only ever been machine milked. Having this knowledge will help you prepare for the adjustment as your cow gets used to the different motion of hand milking. You will often see that cows that have always been machine milked verses hand milked will be less patient at first during the milking, may get sore teats at first (nothing a little udder balm won’t fix) and don’t let down as easy at first. Its something new for them too, and just as you are learning, so are they. For example, an older cow that has always been machine milked, may let down at the sound of the wirrr from the milking machine, eventually she will learn how to let down without it, it just takes time.
Temperament is important. Think about what your milking set up will be. Will you milk in a head gate? On a halter? In a milking station? Choose a cow that has a temperament to suit your milking set up. For example, I milk in a head gate so choosing a milk cow that isn’t halter trained is ok for me, this may be different for you.
Think about how much milk you want. Though hand milking out 4 gallons of milk in a sitting verses 1 gallon sounds like it would take a lot more time, it doesn’t really. For sure it does at first, but as you become more skilled at hand milking, the time difference is marginal and you start to see that the most time consuming part is usually the chores that surround milking, like cleaning the milking stall, straining the milk and doing the dishes. For this reason, I would pick a cow that has the amount of milk you need for your homestead regardless of if you are hand or machine milking.
Setting up a place to milk your cow
In a head gate. I milk my cows in a head gate. This is a good option other than the cow is able to move side to side which usually poses a bit of a problem when first getting my cow used to my set up. You can curb this by adding in a panel on one side until they get used to everything.
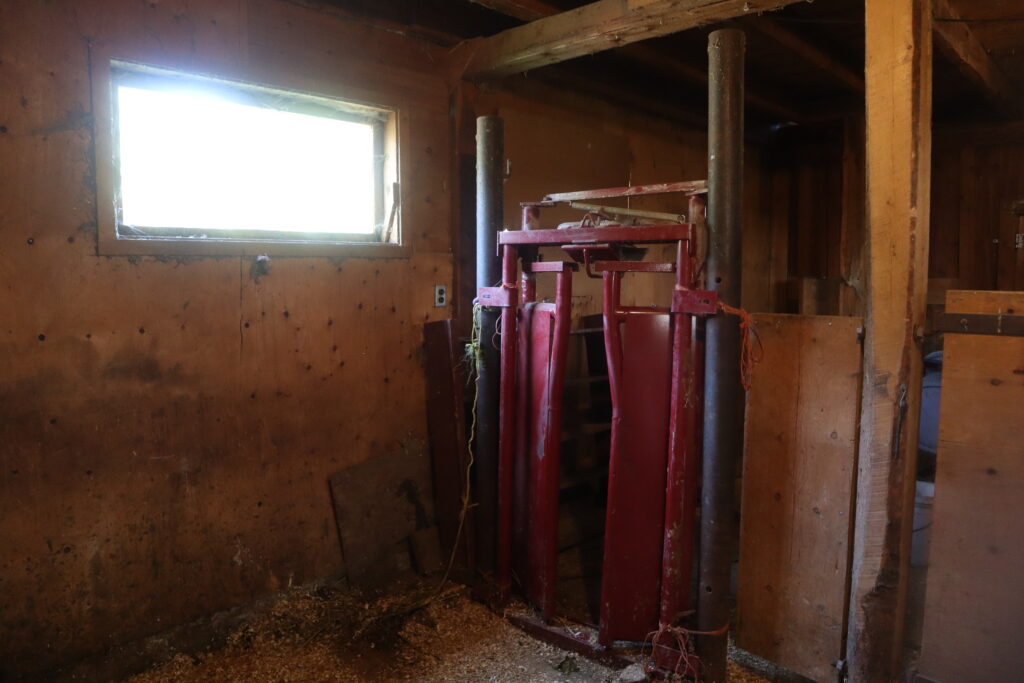
In a chute. If you have a cattle chute on your property, this is usually a pretty good option. We used to milk in our older cattle chute and though it kept us safe from the cow moving side to side and locked their head in, our older chute had a bar on the ground in front of the side swinging doors. This bar made setting a stool on the ground nearly impossible and the only way we were able to milk was by squatting down as we milked. Some of the newer fancier chutes do not have this bar.
Tied up. If you are buying a halter trained milk cow, you may be able to milk them tied up to a fence or for the really well trained cow, you may be able to even just milk in the field where she stands. Remember cows are animals of routine, and bringing a new milk cow home means you are messing with this routine. Even the most well trained milk cow might have a bit of an adjustment period when you first bring her home and having a restraining option is a good idea. One low tech option for restraining your cow if you need to during these adjustment times is to squeeze her between a fence and a swinging gate. Halter her head into the corner and swing the gate over to squeeze her between the fence and the gate.
In a milking stantion. A quick YouTube search will give you plenty of great options for building a homemade milking station. These stations are usually made from wood and have a homemade head gate. One thing that I will caution is that these stations don’t do a great job of restraining a scared cow. A spooked, or untrained cow can easily take a homemade head gate and run, snapping your 2 by 4s like tooth picks. If you are planning to use a homemade wooden milking station, be sure to choose a cow that has a good temperament.
Choosing a floor for your milking stall
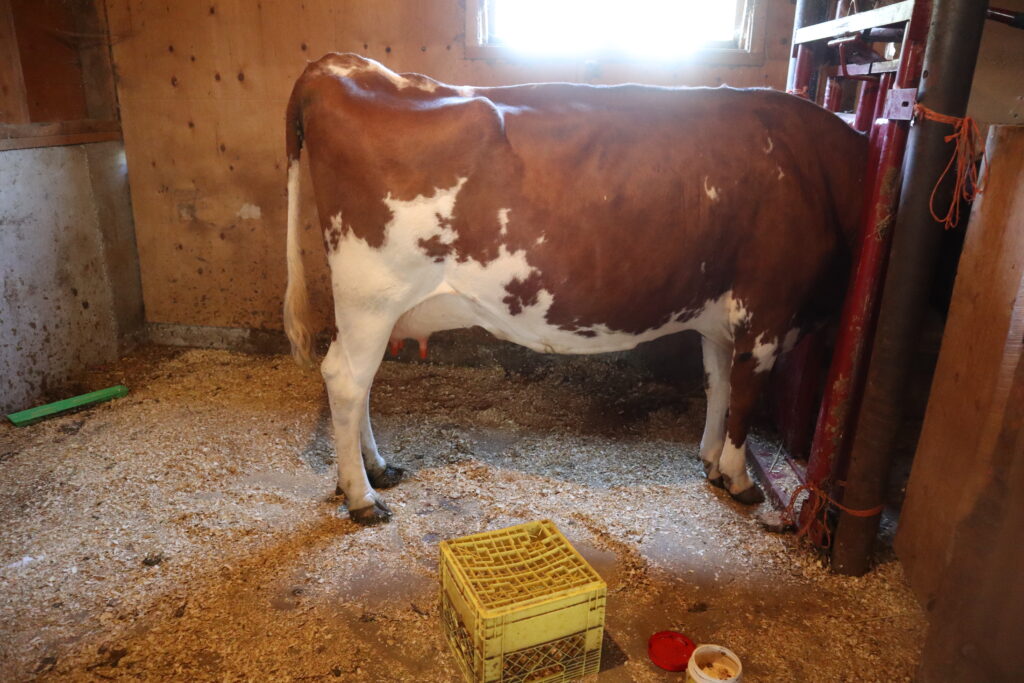
The biggest thing when considering a floor for your milking stall should be non slip. Things like thick washable rubber mats, sawdust, or even a dirt floor will help your cow stay on her feet. In our milking stall we have a cement floor. I keep a thin layer of sawdust on the floor to keep it clean and help with grip. Things like uncovered wood floors or uncovered dirt floors will become quite slippery when wet. Dairy cows tend to not always be super sure footed and the last thing you want is your cow to fall in or going into milking stall.
Keeping your milking stall clean
Because hand milking is a open milking system you want to keep your milking area fairly clean to keep mud, poop, and flys out of your bucket. Depending on season this is sometimes an impossible task. To keep everything as clean as possible, I layer the floor with a thin layer of sawdust to make cleaning up messes, dumped milk, poop and pee, a lot easier.
If you are milking on a dirt floor or a place that is muddy, consider wrapping your bucket in a garbage bag or placing your bucket in a shallow rubber feeding tub during milking. These will keep everything a little cleaner and limit the amount of mud and poop you are exposing your bucket too.
In a perfect world, I would sweep my milking stall out each day and put new sawdust in. That rarely happens and I go by a need to be done basis. If it looks dirty or I start to notice more flys than usual, I do a good sweep and add new clean sawdust.
Equipment you need for hand milking a cow
- Buckets– Stainless steel is preferred as it is easier to clean, but I use plastic 5- 2.5 gallon buckets with lids. They are cheaper and I can keep several to rotate through.
- Rags– My favourite rags are old cut up towels.
- Rag bucket with a lid– I use an old peanut butter jar in the summer and a thermos in the winter to keep my wet wash rags warm.
- Brush– A soft bristled horse brush will do.
- Gentle liquid soap
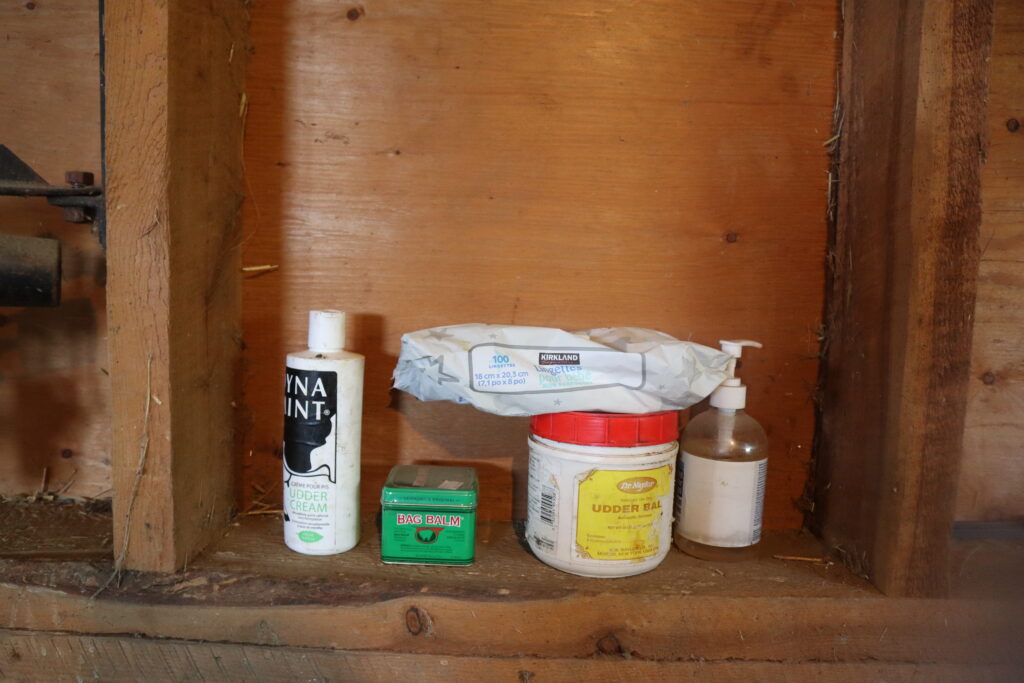
- Teat cream– occasionally, especially when you first bring your milk cow home and their skin is getting used to the new ground, you will need some sort of cream to apply to the teats after or during milking. I like to use udder balm but other more natural choices include coconut oil, tallow or shea butter.
- Milking stool– Some people squat when they milk and though this puts you in a good body position for milking, I like to sit. I sit on a milk crate.
- Pre teat dip (Optional) – Using something called a pre teat dip is something you will see done on dairy farms. It is a wash that is applied to the teats before milking to essentially sterilize the area. I don’t use a pre teat dip on my cows before milking, but rather just wash them really well with soap and water.
- Gloves (Optional) – Some people milk with disposable rubber gloves. This is not something I do but is a good option to prevent cross contamination if you are struggling with mastitis in your herd.
- Cup– Having a cup in the milking stall is a good idea. You won’t have to use it everyday but if you are worried about one teat, it gives you the ability to take a milk sample from only one teat.
- CMT test– California mastitis test is something everyone that is milking a cow should have on hand. CMT tests somatic cell count in milk which can give you a good indication of mastitis. Most CMT tests come with a 4 teat cup plate to help you test each test individually.
- Dynamint cream– Dynamint cream is my first line of defence when it comes to mastitis. If I have even an inkling of mastitis I rub my cows udder in it and most times it stops mastitis before it even starts.
- Post teat dip– Post teat dip is an effective way of preventing mastitis in your milk cow. It is a iodine based dip that you put on your cows teats after milking. The teat ducts of cows stay open after milking for about 20 min. This is a high risk time for environmental contamination that can cause mastitis. By applying a post teat dip after milking you are preventing bacteria from being able to get up the teat canal and into the udder.
- Milking strainer– After milking you will need to strain your milk to get any particles, dust, or hair out. You can do this through a few layers of cheese cloth but the safest most effective way is to have a milking strainer with disposable milking filters.
- Glass jars– I store most of my milk for cheesemaking in plastic 5 gallon buckets in the fridge. I like this method because it makes the cream easy to skim (wide surface area) and it keeps my cheesemaking in check. I only like to make cheese with milk that is no older than 2 days. This works well because I can only fit 3 buckets in my fridge. It keeps me accountable! Plastic is harder to clean and opens your milk up to more contamination, especially if you are storing for a long time, glass is a better option for longer term storage like drinking milk. We use gallon pickle jars (ask around at restaurants or order online) or 1/2 gallon milk jars for easier pouring. Side note- To get the pickle smell out of jars, let them sit outside open in the sun for a few days.
- An extra fridge– Look on buy and sell pages for an extra fridge, you are going to want one for all the milk!
- Starsan (Optional)– I wash my equipment with warm soapy water, and occasionally a bleach rinse, but starsan is a acid based remover that gets off even the milk stone you can’t see. Lots of people choose to wash their milking equipment at least once a week with starsan.
How to hand milk a cow
Secure your cow in your milking stall or wherever you plan to milk her (see above for milking stall set up), brush your cow off to get any loose debris or hair. Although brushing is recommended practise, sometimes I feel like it opens a can of worms in the sense that especially during heavy shedding times, it causes hair to go everywhere and it hasn’t necessarily always settled by the time you are ready to milk. So brush at your own discretion! One area I do brush is the upper udder to get any debris directly off the udder.
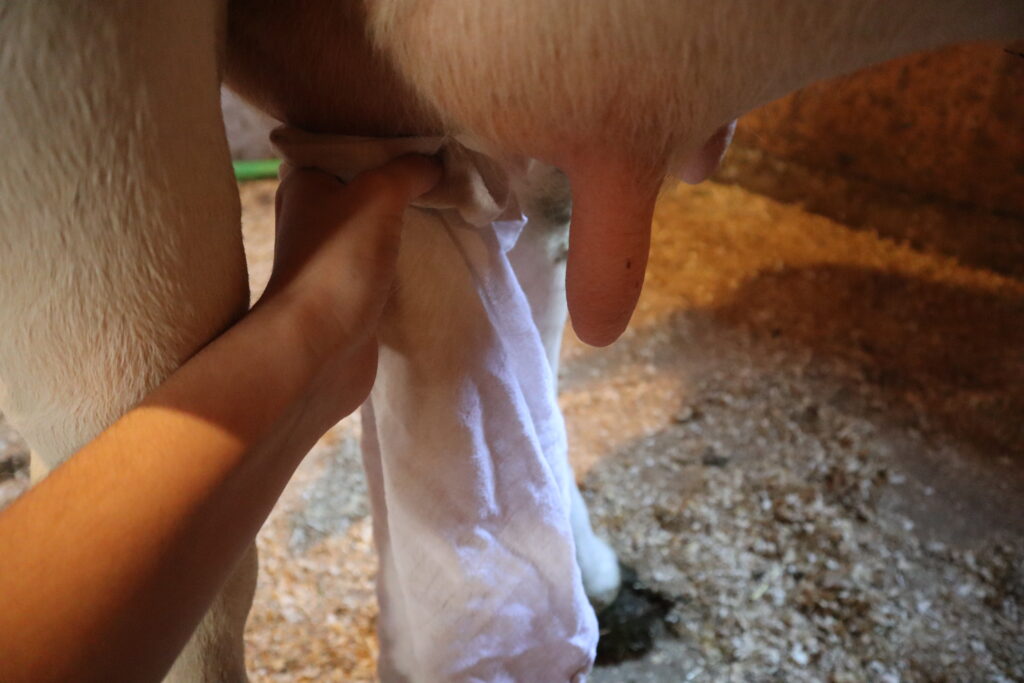
Wash the udder with a rag soaked in warm water and a gentle soap. Go clean to dirtiest and pack a few rags incase the teats are very dirty.
Tip- In cooler temperatures, I like to store my milk rags in thermos to keep them warm, this helps your cow with let down later on. Nobody wants a cold titty wash!
Dry the teats off well with a clean dry rag. You will notice that drying the teats off completely helps with friction later on during milking. It is important to clean your cows udder regardless of if you will be keeping the milk or not. For example, even if you plan to throw the milk to the pigs today, clean the udder because it helps keep bacteria from entering into your cows teat canals during milking.
Tip- I store extra baby wipes in the milking stall just incase it is a really dirty day for the udder.
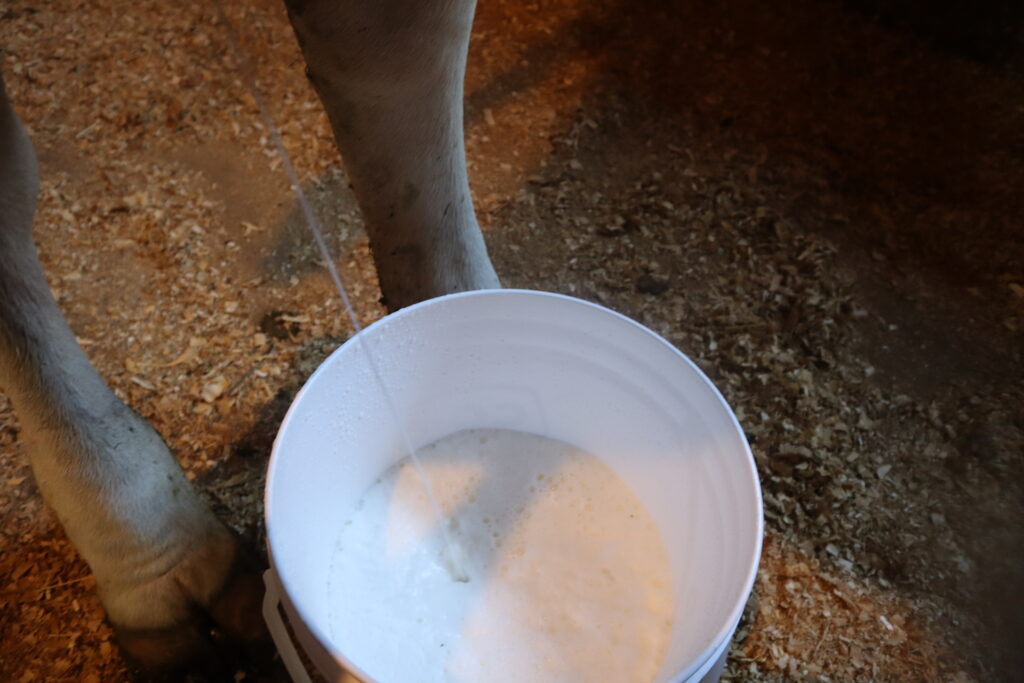
Begin by squirting a few squirts from each teat onto the ground. You can do this while you are washing if you would like, or do it after you sit down. The first milk that comes out of the teats will be the highest somatic cell count milk (meaning the highest risk of contaminants)
Place your bucket under your cow directly on the ground or between your knees. For tall cows you will be able to place the bucket between your knees but for short cows or cows that have an udder that is tucked farther back, you won’t be able to.
Tip- If the ground is dirty, place your bucket directly in a garbage bag or a shallow rubber feed tub to keep the bottom clean.
If you are solo milking choose either the back or front teats to milk first. If you have a friend on the other side, take the teats on your side to start.
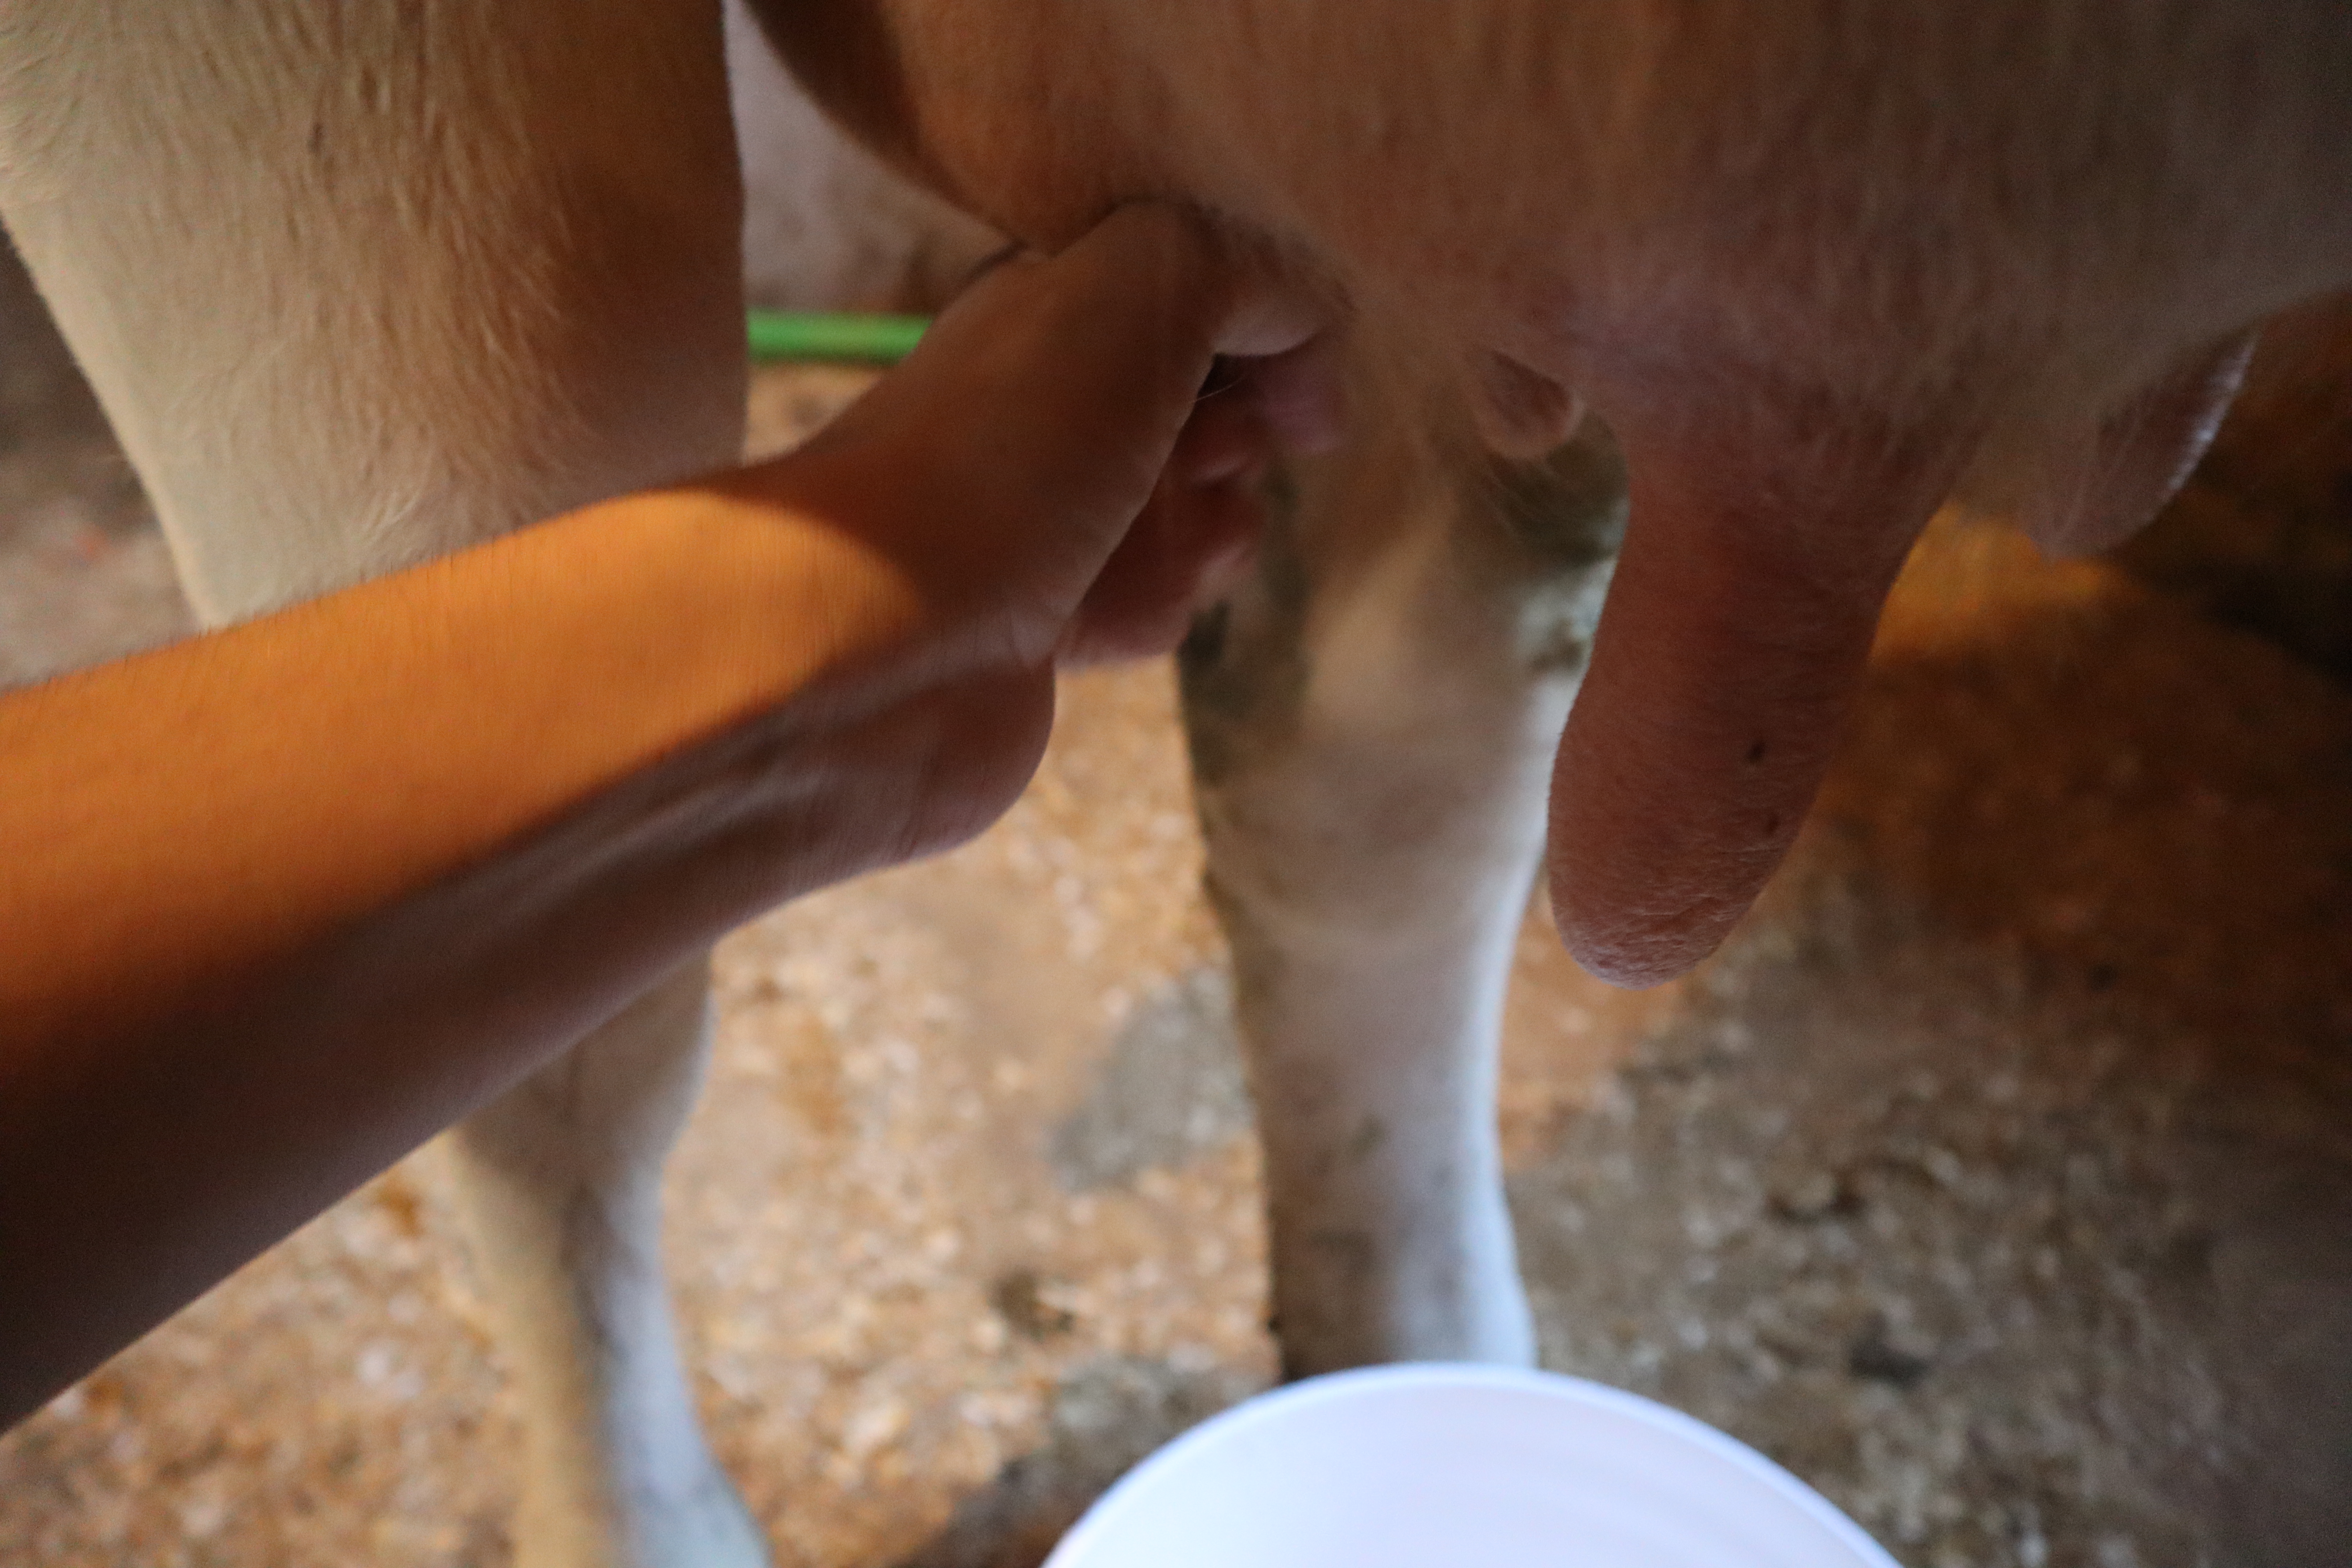
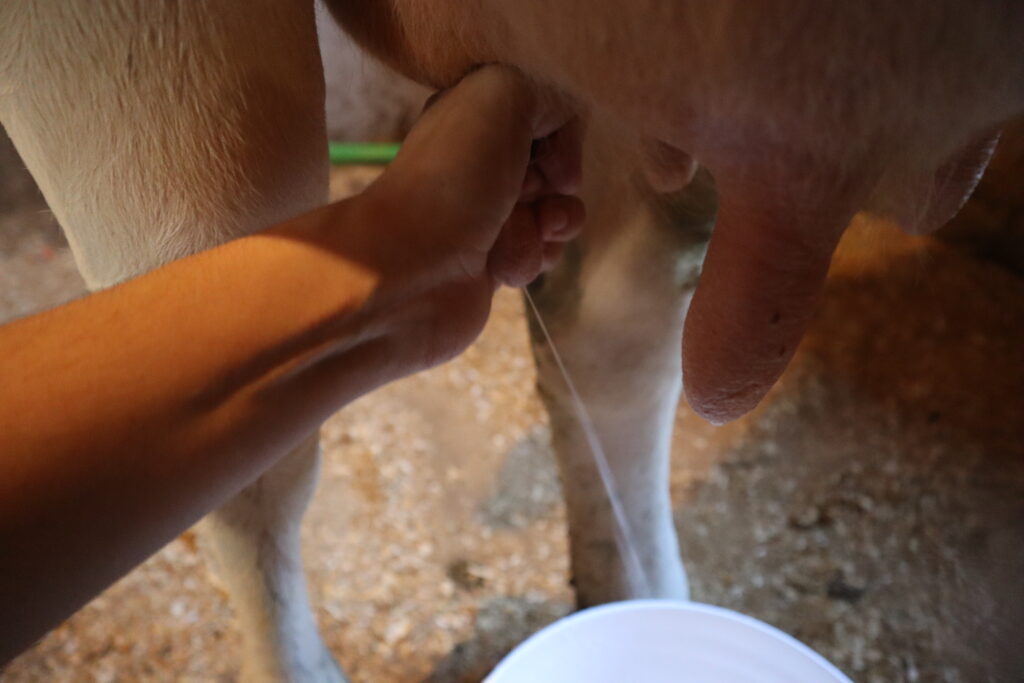
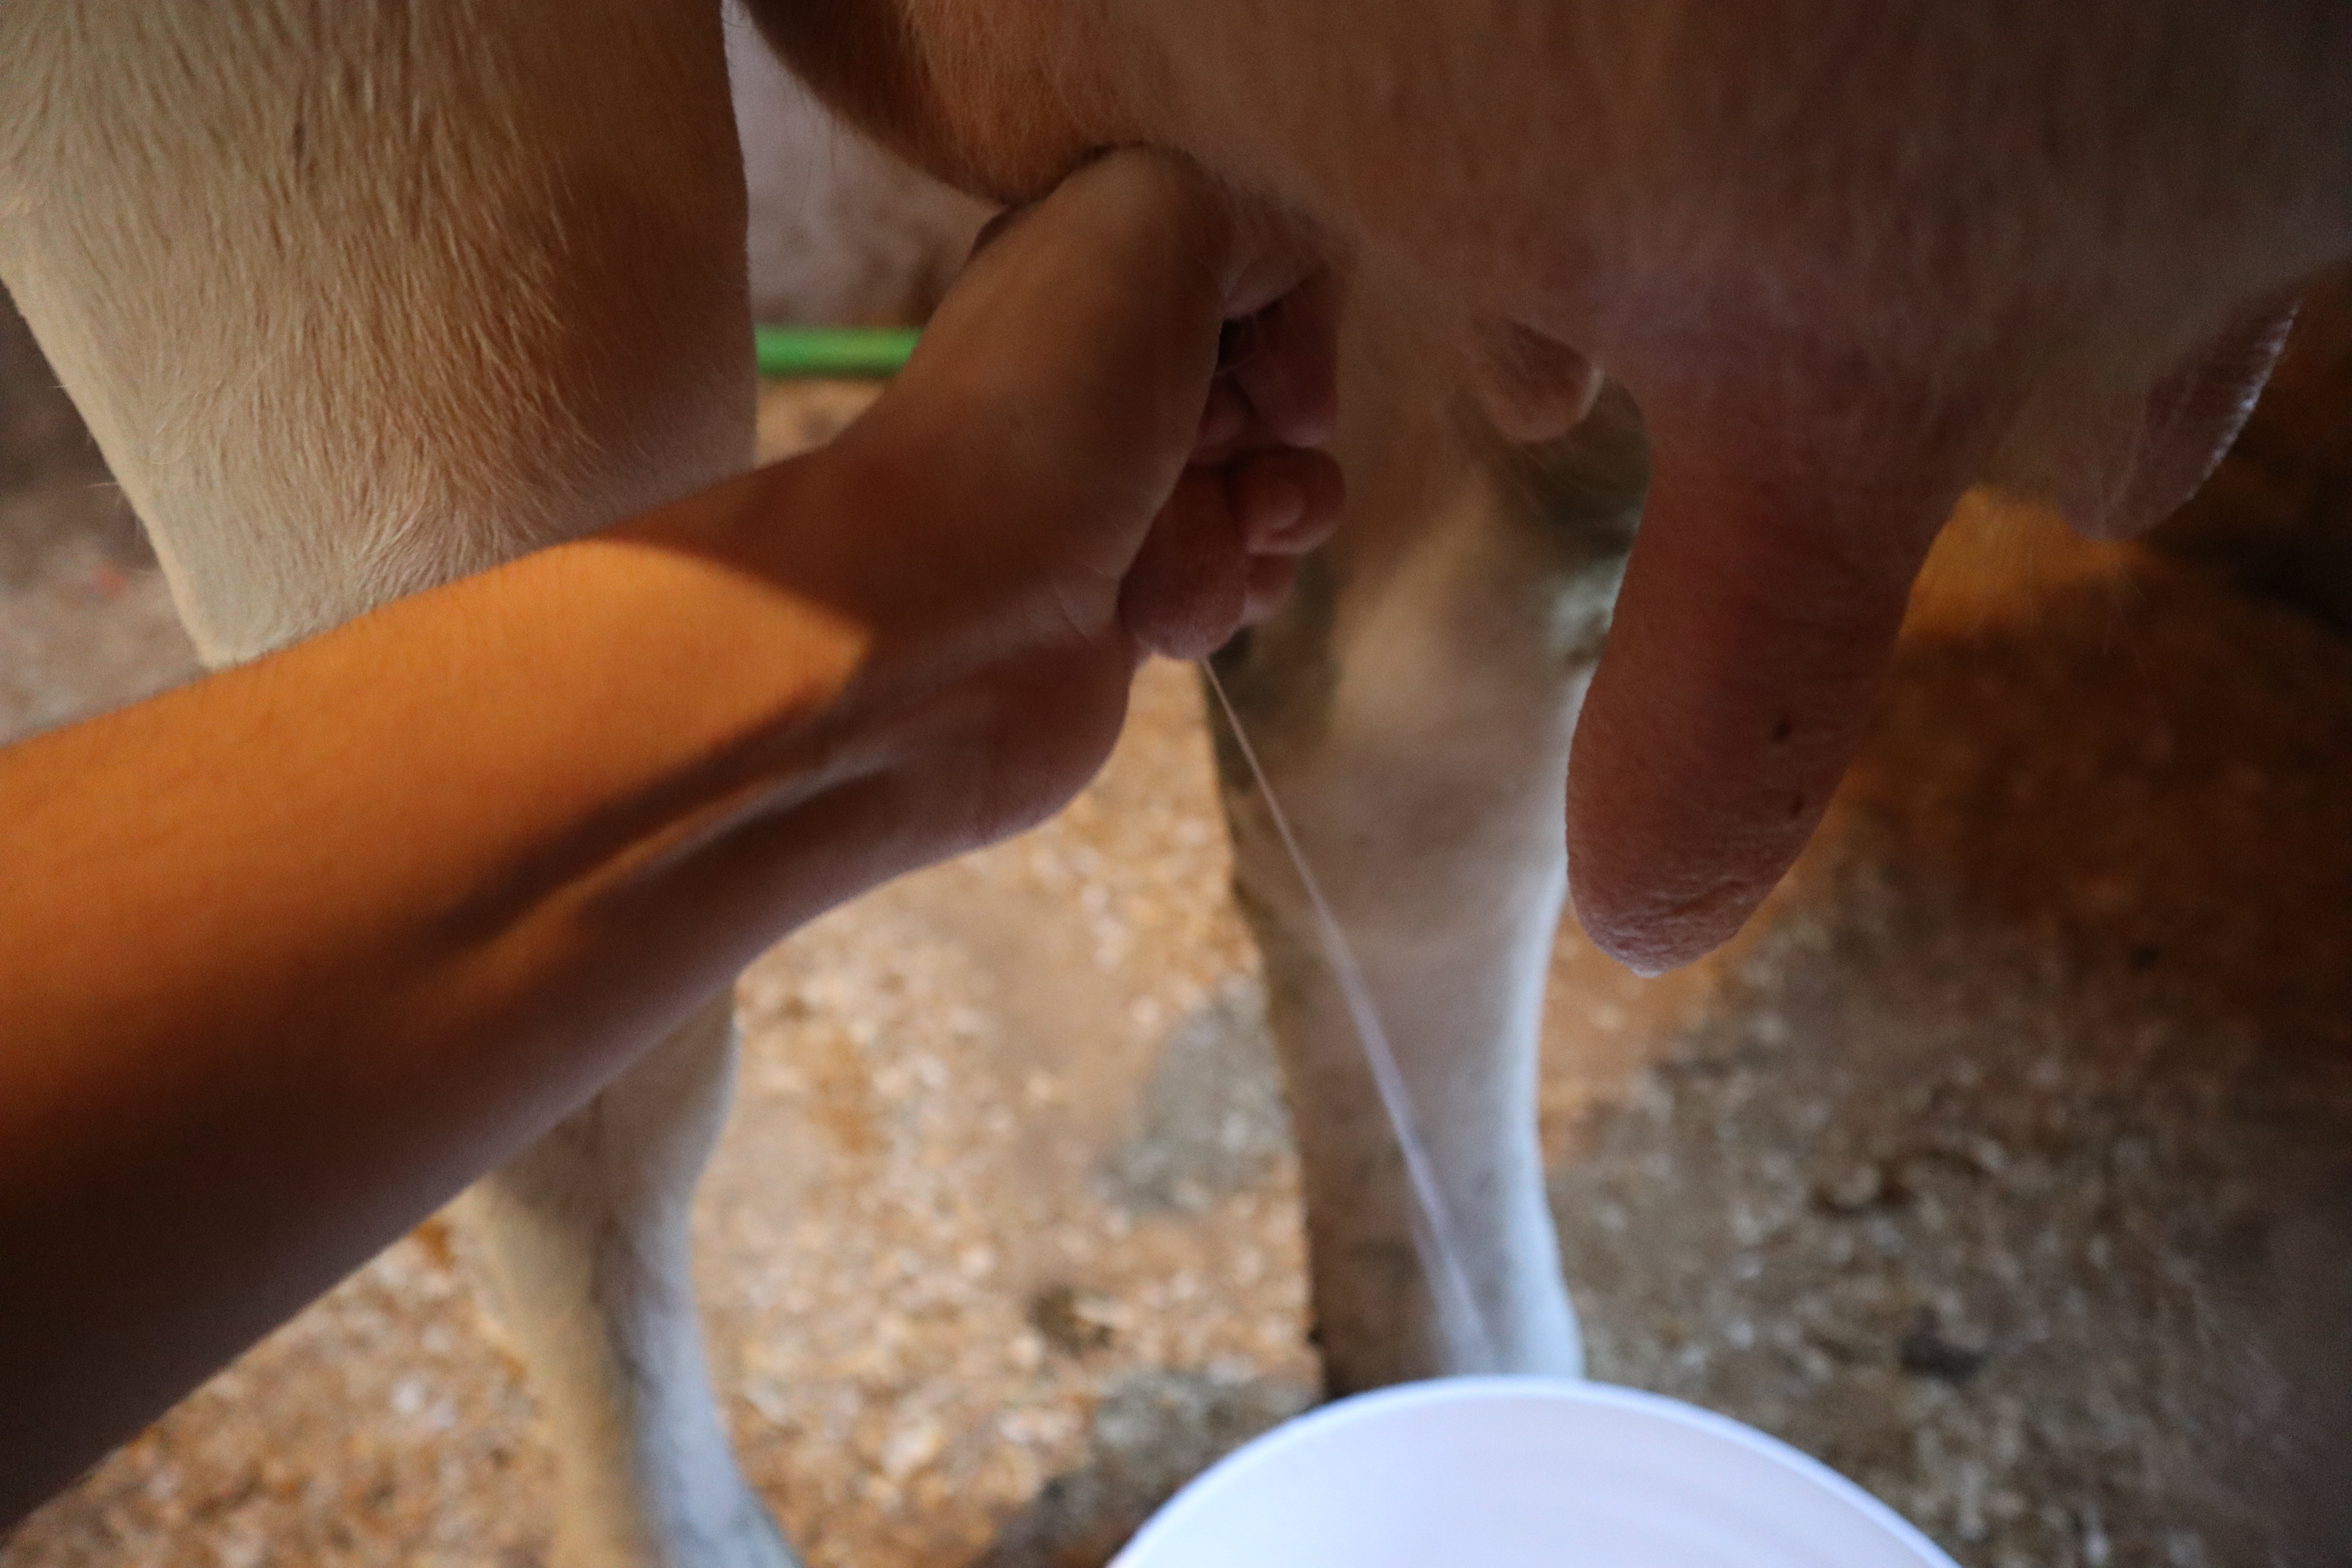
I refer to the beginning motion of milking as “full hand milking”. It is quite hard to explain in words how the actual motion of milking goes, and its one of those things that you certainly learn as you go but if I had to describe it I would say this; Begin by placing a full hand on the cows teat. Use your thumb and forefinger to squeeze first essentially locking the milk into the teat, your three bottom fingers will squeeze next. Once you have a stream of milk, release, and repeat.
If you have never milked a cow, don’t get hung up on trying to figure out what that motion is, until your hands are actually on the teat, the more you do it, the more you will understand what I mean. If you are milking solo, milk both back teats or both front teats out first before going on to the other 2. The reason for doing this is so that you can stay on one side the entire milking and won’t have to move to the other side.
Continue to full hand milk until you are getting very little milk from the teats. When this happens it means that the milk is nearing being drained and it is time to start the next motion of milking called “stripping out”.
When you are first learning how to milk, stripping out may actually be easier for you, but its important that you try to full hand milk as long as you can because stripping can be hard on your wrists (carpal tunnel) and it can also be hard on your cows teats if done in excess.
Tip– If a spec of poop or a fly falls in the milking bucket I use the 10 second rule. Dip it out with my finger and continue on. It is inevitable in an open milking system that you will have things fall in the bucket, by using good pre cleaning techniques and straining and chilling your milk quickly after milking, you are limiting the chance of contamination. Remember, with raw milk its not about limiting all the bacteria, but ensuring that your cow is healthy and happy which means the good bacteria is strong and will win out in the end. Problems with raw milk date back not so much to when milk was milked out by hand, but to when milk was coming from unhealthy cows and transported in unsanitary ways.
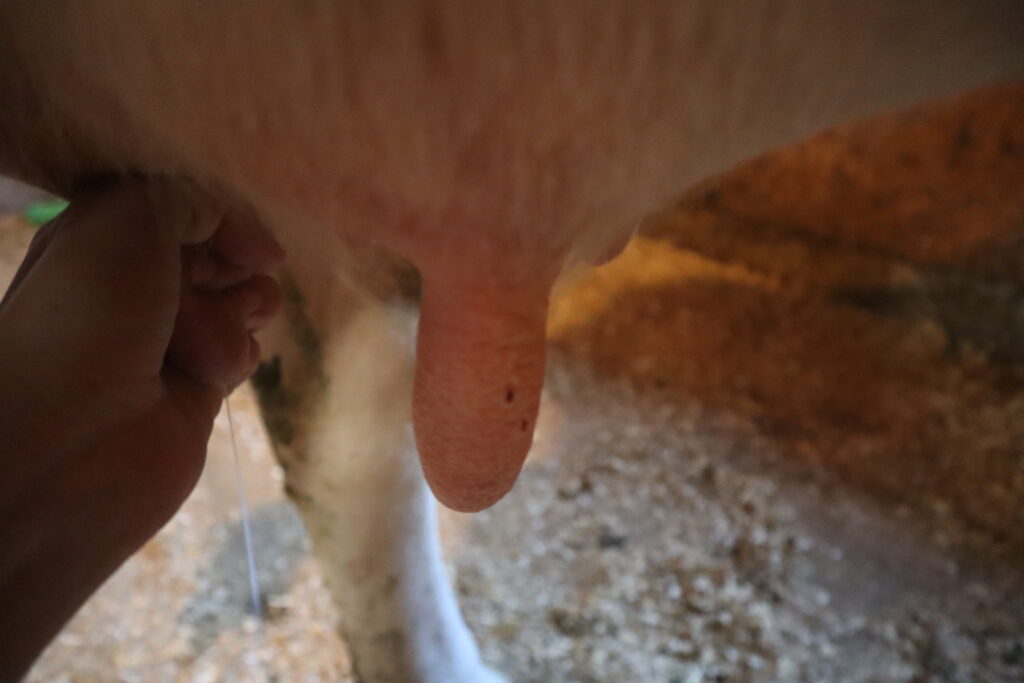
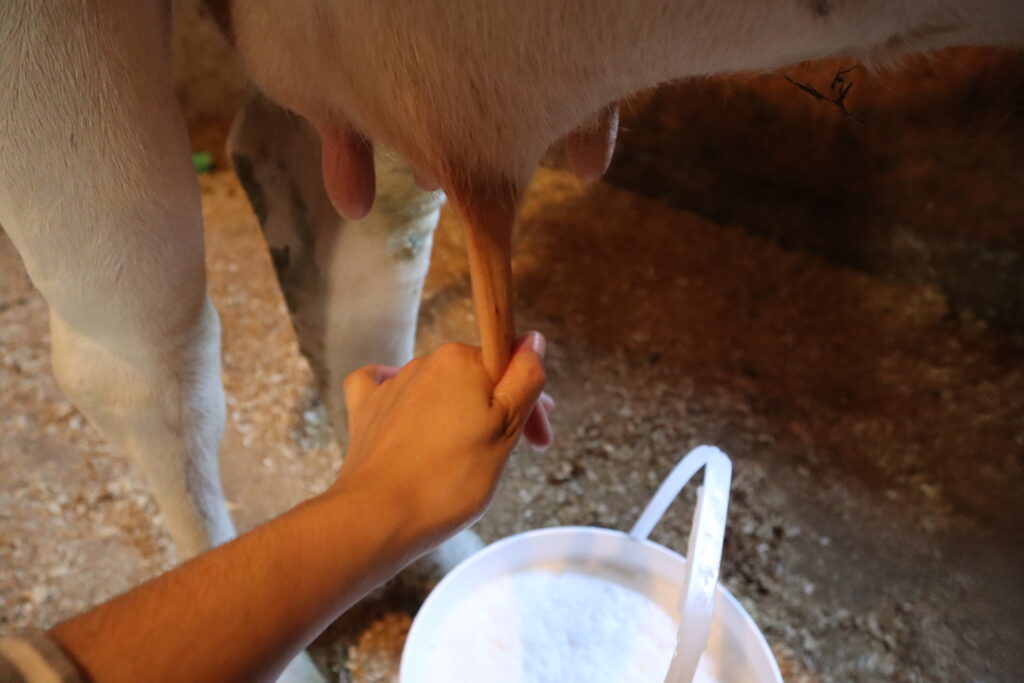
To strip out place your thumb and forefinger on the teat, pinch them together and drag them down to the bottom. Stripping out is necessary when the teat is not filling up completely with milk because either the quarter is close to being drained, or your cow is not letting milk down as much or as quickly. This technique pinches the milk off into the teat and brings it out much like when you are trying to get the last dredges from a toothpaste tube.
Depending on your cow and her let down sometimes you can end up stripping out for quite awhile. In fact I would say this is the part that takes the longest. For example, I can milk 2 gallons from my cow in about 5 min using full hand milking, but the last 10min is me stripping out half a gallon of milk.
Even though it takes a long time, It is important to fully strip your cow out. Leaving milk in the udder opens your cow up to increased risk of mastitis, as well, the creamiest milk comes last so you want to make sure you get it all! Strip out your cow until all you are getting is spits.
Tip- In nature, calves bump the udder with their heads to get the last bits of milk out and induce let down, when I am stripping out a cow, I bump the top of each quarter a few times to make sure I have gotten all the milk she has for me.
Once you have taken as much milk as you can out, apply a post teat dip to each teat. You can spray your teat dip on, but I prefer to use a dip cup and dip each teat into the cup. To properly use a teat dip cup, squeeze the bottle to bring a small amount of dip up into the cup, dump this first teat dip out onto the ground to clean the vessel. Put the teat into the cup and squeeze the bottle, teat dip will come up into the cup and should coat the bottom half of the teat. You will notice in my milking video that I do not use teat dip, this is something I tried for awhile but I had problems with the health of my cow and I now recommend using teat dip. Its an easy preventative measure for mastitis that may even save your cows life!
Once you have finished milking, transport your milk quickly to your milk cleaning area in a covered bucket. In hot weather I try to make this time quick, but in cooler weather sometimes it is taking me 20 min to get back in the house. The quicker you can strain your milk, the quicker you can prevent unwanted contamination.
Strain your milk through a milk strainer or at least 2 layers of heavy cheese cloth. I prefer using a milk strainer with disposable filters.
Feed your clabber culture.
Immediately chill your milk in the refrigerator. If you are struggling with taste or contamination issues consider rapid chilling your milk in the freezer for 1 hour before moving to the fridge. I don’t do this because I know I would forget it in there!
Wash your milking dishes and equipment immediately after milking. Wash clean to dirty, so your barn dishes should be washed last. Consider using starsan or a bleach rinse once a week at least or using the sanitizing function on your dishwasher.
FAQs
Historically in most communities there was always someone to teach you how to milk. These days even agriculture communities, there are very few hand milked cows. Its normal to have questions around hand milking, and these are some of the most common ones I am asked.
How long does it take to milk a cow?
It depends on both the specific cow and your experience level. I have had several milk cows through the years and I can honestly say that even though I know how to milk, they have all milked out in different time frames. Cows have different let down responses, and teat canal sizes. These dictate how fast the milk will actually come out.
If you are just learning to milk, give it time. Eventually your hands will get stronger and you will be milking your cow out a lot quicker. Typically when you first bring a milk cow home, even if you have experience milking a cow, their let down times will be longer as they adjust to the new environment and its not abnormal for milking to take an hour or more. As you both become more comfortable with each other milking times will become faster and most people are able to milk their cows out in 20-30min.
Does it hurt my cow to hand milk her?
As long as you are using proper technique, no it won’t hurt your cow. Extensive “stripping out” (Im talking, never ever full hand milking and only stripping) will cause sore teats but at the end of the day it is more damaging to leave milk in, than to get it out with a stripping motion.
Cows that aren’t letting down, will need to be stripped out. Its literally the only way to get the milk out. Know that it will get better, once cows become accustomed to their new environment they will start letting down better.
In the first weeks after first getting your milk cow, practice your full hand technique as much as you can. In the end this is the most effective, fast and safe way to get the majority of the milk out.
Is it normal for 1 or 2 teats to have more milk?
Yes, this is completely normal. A cows udder is not one giant bag, but actually 4 different bags, we call these quarters. Each quarter can produce different amounts of milk. Typically you will see more milk in either the back quarters or the front quarters, its very rare that it is even. For example, I get about 2 gallons from the back quarters of my cow and only 1/2 gallon from the front.
Sometimes you can have what is called a dead quarter, this means that a quarter does not produce any milk. Usually this is caused by past injury or a bad case of mastitis. Be wary of buying cows with dead quarters without first testing their milk for something called staph aureus (staph a). Staph a is an extremely hard to treat mastitis, that is prevalent in many dairy herds. Its hard to treat and can present at first with no symptoms.
How often should cows be milked?
This could be its own post entirely, but the short of it is every cow is different but usually for full breed dairy cows it is every 12 hours.
Things like lower producing dairy cows, calf sharing and stage of lactation will allow you to milk at less frequent intervals. This is something we have blog posts about in the milkmaid society.
I milk my cow on a 16 hour milking schedule which is something called a 2 in 3 milking schedule.
Does a cow need to be pregnant to produce milk?
No. Cows will start producing milk after they calve and will continue to produce milk regardless of if they are pregnant or not. Just as a human con produce milk for years without interruption, cows can as well. For the health of the cow and the quality of the milk usually cows are bred back every 1-2 years to keep them healthy and give them a break between milking.
Usually dairy cows are given a 3-4 month break between producing milk and having their next calf. This allows for them to focus all their energy on growing their calf (their calf will grow 70% in the final trimester) and maintaining their body condition during this high energy time.
Can I take only as much milk as I want and leave the rest?
Unless you are calf sharing and that calf is large enough to handle the excess milk, this is not advisable. High producing dairy cows are built for production, that means that they will produce at all costs and though only taking a little milk will slow down their production, it is at the risk that they get mastitis in the meantime.
Even high producing milk cows that are calf sharing usually need to be milked twice a day fully, until the calf is big enough to handle at least one of the milkings, this can take up to 2 months. A good option for this if you are worried about using all the milk, is to choose a lower producing dairy breed.
The teats are getting sticky while hand milking
If you are struggling with sticky teats, this is most often caused by accidentally spraying the teats with milk. Focus on not spraying when you milk but getting an even stream into the bucket. This may mean you have to milk slower until you get the hang of it, but it will eventually make a difference.
If you do spray them or your hands with milk, wash off with an extra rag and dry completely before re starting.
Can I apply cream to the teats while hand milking?
If you are finding the teats dry during milking, apply a small amount of cream or oil. I usually use udder balm but you can use a more food safe option like coconut oil or tallow if you would rather.
My cow isn’t letting down
If you are finding that it is very difficult to get the milk out with full hand milking, you are often stripping out, your cows udder still feels full on top when you are done milking, or she looks like she is still full when she leaves the milking stall, and you are seeing very small cream lines on top of your milk, there is a good chance your cow isn’t letting down as easily.
There are many reasons a cow might not be letting down for you. The biggest reason that people struggle with is calf sharing, the cow has the capability to save the high fat hind milk for her calf and leave you with the skim front milk. Calf sharing and let down is a post for another day or you can learn more in the milkmaid society.
Cows are animals of routine and if you just brought your cow home, there is a good chance she won’t be letting down fully until she establishes a routine. You can encourage let down by helping her to establish a routine (milking on time, doing the same thing each day ect.), as well as just giving her time to get used to the new situation. You can also encourage let down by taking extra time during milking in those first few weeks. If you feel like she is not letting down, bunt her udder a few times as a calf might do when it is drinking.
It is easy to worry in those first few weeks that your cow not letting down will cause mastitis. At the end of the day, you can’t make them let down, all you can do is give them a supportive, safe environment and do your best to get all the milk out. Eventually they will begin to feel comfortable and they will start letting down. As for mastitis, though im sure possible, I have never heard of a case of mastitis from a cow not letting down.
My cow has a sore teat, should I still milk her?
Yes. High producing dairy cows need the milk to come out, even if their teats are sore. Leaving the milk in opens them up to a risk of mastitis and infection.
It’s not pleasant to milk a cow with a sore teat or a teat injury but with patience, even the worst injuries often heal completely. You can support your cow during these times by milking that teat last and being patient with them. For a kicky cow try milking into a cup, or even on the ground if you have to. Its a good idea if the injury is bad, to wear gloves and use good hand hygiene to prevent infecting the wound. Often times creams like lanolin or udder balm will help sooth the injury while you milk. Though it is not approved and I would ask your vet, I often use an over the counter lidocaine spray on the affected teat to help freeze the area slightly while milking. After milking be sure to clean with an iodine based teat dip.
Monitor for signs of infection and remember, Im not a vet! Your vet knows best!
Can I hand milk sometimes and machine milk other times?
Yes! Sometimes people choose to both machine and hand milk their cows. Its very beneficial actually to have both skills and though you may find your cow prefers one or there other, they should get used to both over time.
Can I use a hand held milking tool?
No. These types of milking cups that squeeze the teat and allow the milk to go into a hand held cup can be very damaging to the cows teats. Just as a machine that does not have a pulsator should not be used, hand held milking tools are not recommended.
Additional Resources on hand milking a cow
- Tutorial on how to hand milk a cow
- Tutorial on how to properly strip out your cow
- Tutorial on how to properly handle your raw milk
- The Milkmaid Society- A community of milkmaids! A monthly membership filled with resources built by milkmaids, for milkmaids.
- Sign up for my FREE Buying a Milk Cow Email Masterclass.