I am often asked, what is the best beginner cheese to make and my answer is always the same, Feta! Feta is such a great beginner cheese because it can be made using minimal ingredients, equipment and can be aged in your regular refrigerator. In fact, if I was to make one cheese, and no other, it would probably be feta, its that good!
Feta uses a smaller amount of milk
One of the best things about feta, is it is a great cheese to make with a smaller amount of milk, because feta is a type of cheese that you generally don’t sit down and eat with crackers. It is more of a sprinkle on salads type of cheese. A little goes a long way! This is ironic however, because the greek translation of Feta literally means “slice”, and in Greece though it may be added to salads, it is also eaten by the slice.

You don’t need a cheese press!
When I first learned how to make cheese, I assumed you needed a cheese press for most cheeses. I was very wrong! Some softer cheeses such as feta and brie are able to press with their own weight, this means that you don’t need to go out and buy a cheese press!
In fact in this recipe, you probably won’t need to go out and buy anything other than a few of the ingredients like culture and rennet.
You can age feta in your regular refrigerator
Aging cheese hangs people up! When I was first learning how to make cheese, I had no idea how to set up an area to age my cheese. Luckily feta is a great starter cheese, because it can be aged in a brine in your regular refrigerator. Even now that I have a proper cheese cave set up, I still age my feta in our main refrigerator.
Traditional Feta vs. Cows Milk Feta
Traditional feta is made with sheeps milk mixed with a small amount of goats milk. The European Union has laws dictating how much goats milk may be mixed with sheep’s milk to make a feta. To complicate things, (but in my opinion, also make it more awesome), the milk must come from the same jurisdiction. Feta accounts for 10% of Greeces exports, and because there are a lot of regulations around the word “feta” my cows milk version technically shouldn’t be called feta. I should be calling it Cows Milk Slice to make it more politically correct, but no one would click on this link if I did that, and well ………. no clicks, no content!
Raw Goats and Sheep Milk contain a higher amount of an enzyme called lipase, this enzymes purpose is to bind to fat globules and facilitate the release of amino acids. This higher concentration of lipase in the milk tends to produce a stronger tasting cheese and it gives feta that traditional tang.
My cows milk version does not have the same tang, but don’t throw the idea of making cows milk feta out yet! This un tangy version is a perfect salad topper, pasta accompaniment, and a great candidate for my feta dip recipe. You may notice that some other cows milk feta recipes add lipase into their cheese during the making, you are more than welcome to do this if you are craving that tang, but I have actually come to prefer the mild taste of cows milk feta.
Ingredients
This 4 ingredient cheese takes minimal milk to make a HUGE batch of feta! You can cut the recipe in half if you would like by simply cutting the ingredients in half. I always say, when using rennet, always use your package directions for how much to use, verses the recipe directions.
- 2.5 Gallons Raw Milk– You can use pasteurized milk for this recipe, but be sure that it is not homogenized, and not ultra- pasteurized. If using pasteurized milk, you will also need to add something called calcium chloride, into your milk before adding in the rennet. The reason for this is that the calcium content in the milk is damaged during pasteurization so you need to add it back in.
- 1/2 tsp Freeze Dried Mesophilic Culture or 3/4 cup well fed Clabber – I have tested this recipe with both freeze dried culture as well as clabber and hands down, the clabber version is my favourite!
- Rennet– I always say use your rennet according to your package directions. Different rennets have different strengths. They will all work for this recipe with the exception of junket rennet. Junket rennet does not work well for cheesemaking. I stock double strength calf rennet and use 1/2tsp for this 2.5 gallon batch of cheese.
- Fine Ground Salt– Be sure that your salt has no additives. You can source it from the grocery or health food store in the canning section. When you read the ingredient list it should say nothing but salt. Salts are notorious for being sold with anti clumping agents and iodine, so be wary of these.
Tools you will need to make feta
As far as equipment goes, to make this cheese, it is about as easy and low maintenance as it comes! Use a pot you already have, equipment from your regular kitchen, old yogurt containers (or feta containers) with holes poked in them for the forms and best of all, your regular refrigerator for aging!
- Kitchen Thermometer
- A saucepan that will hold 2.5 gallons of milk
- Large spoon and knife
- Measuring cups and spoons
- Cheese cloth
- Colander
- Feta cheese forms– You can easily make these at home by poking holes in old yogurt containers. Don’t have any yogurt containers? Simply drain your feta in a cheese cloth hung from the cupboard.
- Drying rack overtop of a pan– This is just a fancy word for a cookie rack.
- Gallon jar– Old pickle jars work great for this. Pro hack- To get the pickle smell out, set the jars and lids out in the sun for several days.
How to make feta cheese
Warm Milk to 90F (32C)

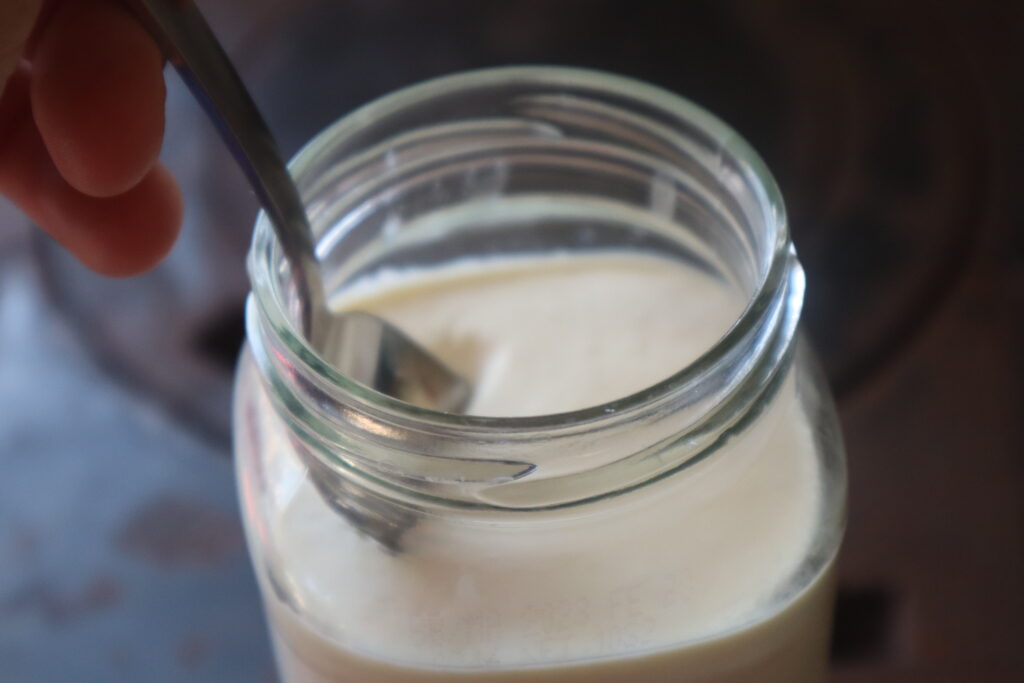
Sprinkle Freeze dried mesophilic culture over the surface of the milk. Let it rehydrate for 5 min before gently incorporating it into the milk with an up and down stirring motion. If you are using clabber culture instead of mesophilic culture, whisk or stir the clabber culture into your milk to incorporate. To avoid clumps, I like to whisk my clabber culture into several cups of liquid milk before incorporating it into the entire pot.
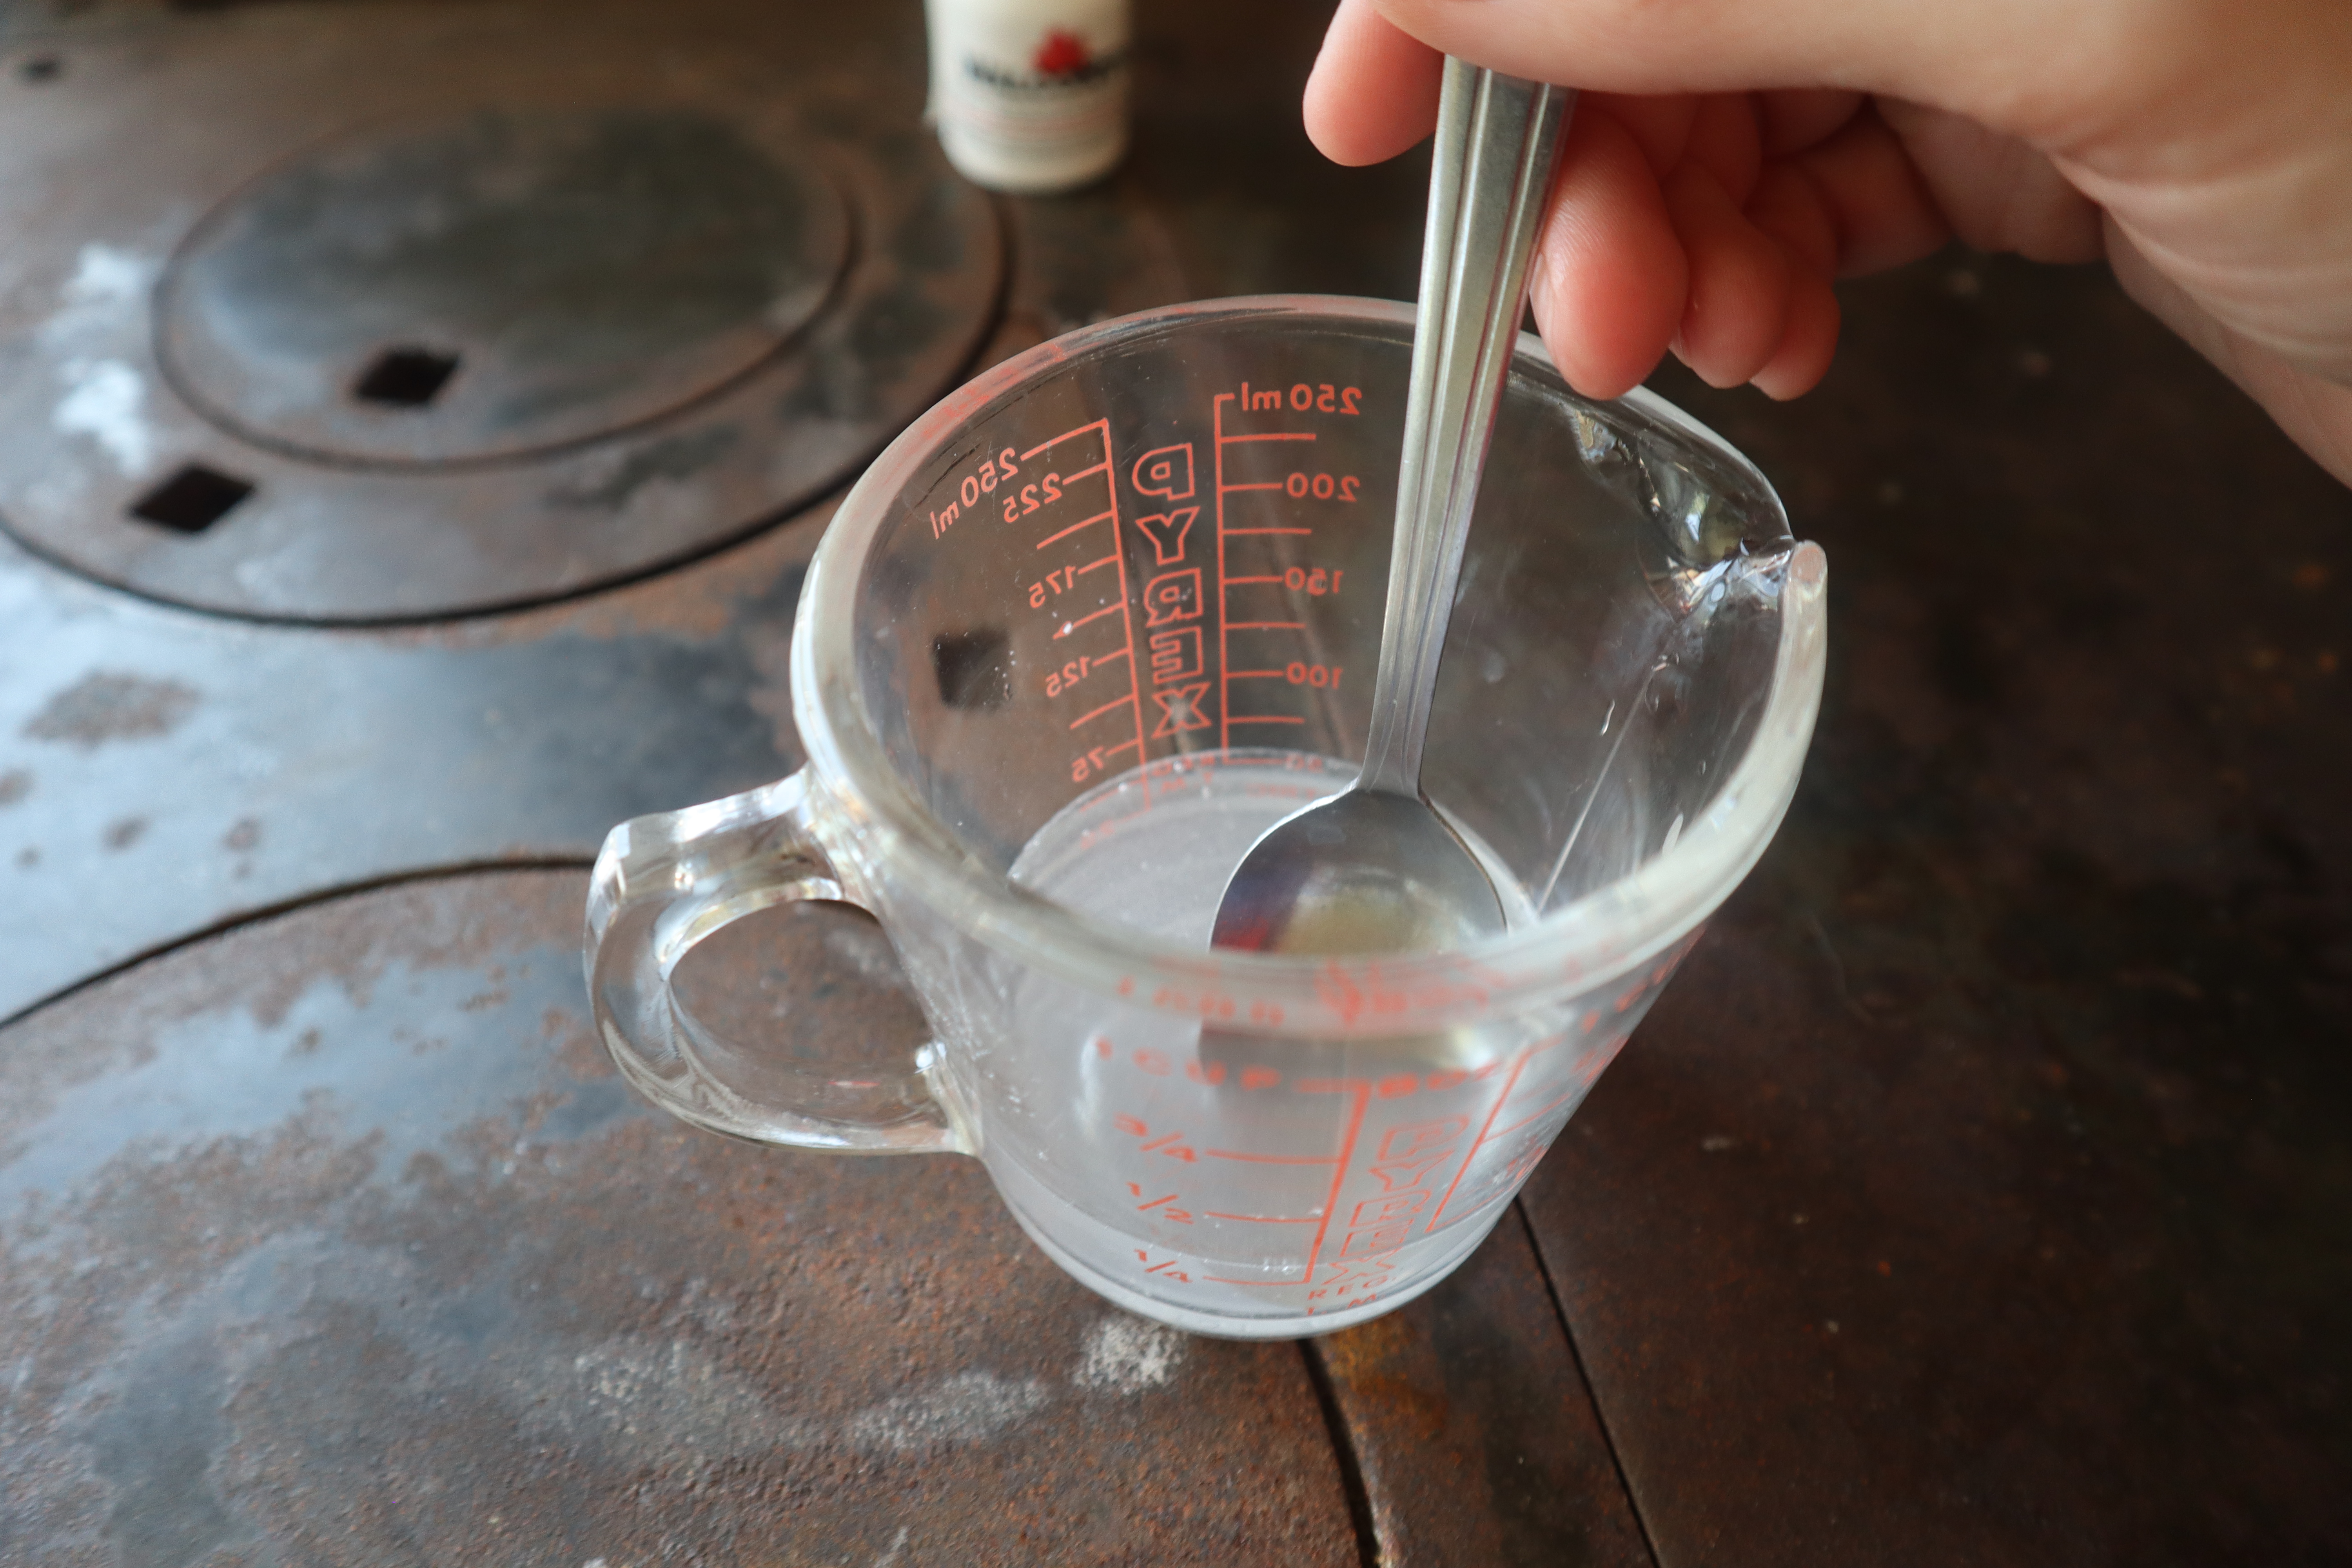
Dilute Rennet in 1/4 cup cool water. Incorporate gently, but thoroughly into milk.
Let sit covered for 1 hour until you achieve a clean break. A clean break is when you stick your finger under the surface of the curds, and gently lift upwards. The milk should split at the surface, in a “clean break”.
Once you achieve a clean break, cut a grid of 3/4 inch cubes. This means cut horizontally, vertically, and up and down so that your curds are 3/4 inch cubes. Let them sit for 5 min so that they “firm up”.
Stir curds gently for 20-30 min or until they have shrunk slightly, and when pressed between your fingers, they break apart, but have a slight firmness, similar to a poached egg.
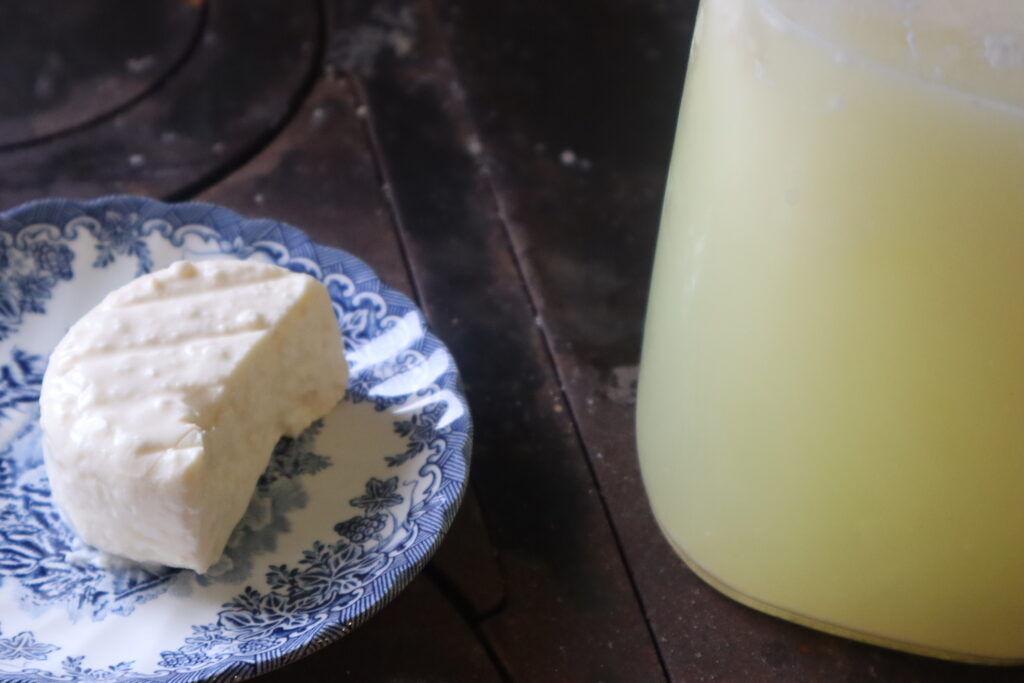
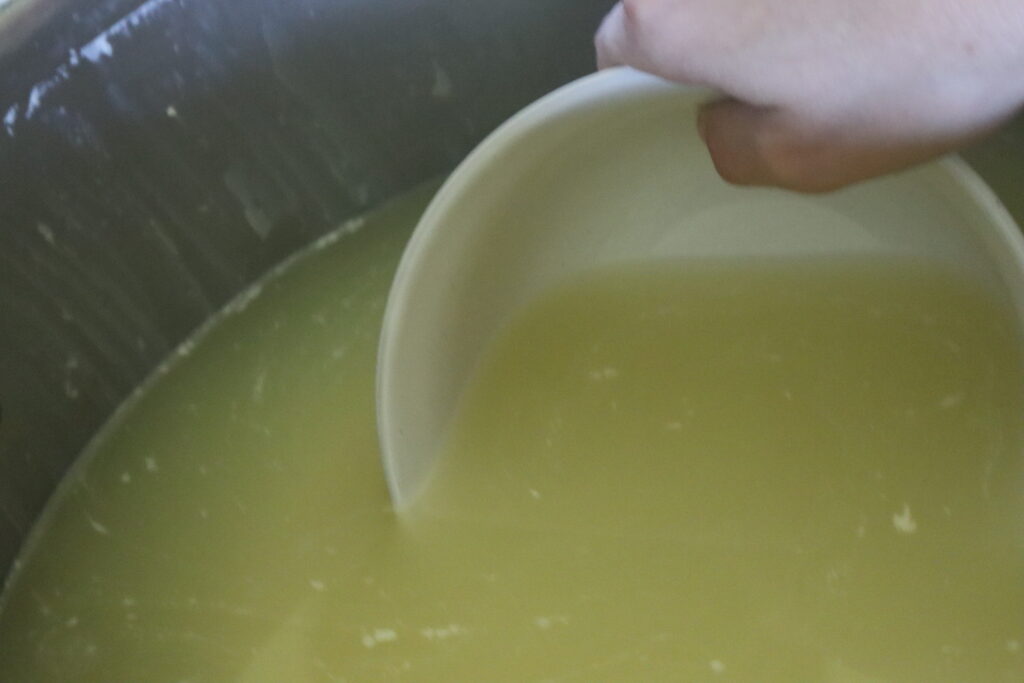
Let curds settle to the bottom of your pot. Scoop off the whey and reserve about half a gallon for a salt brine (I always reserve a little bit more just to be safe). An important step in preventing something called “dissolving feta”, is to treat your whey the exact same as you treat your cheese. This means you want it to live beside your cheese at whatever temperature your cheese is, and you want to salt it at the same time that you salt your cheese.
Drain remaining curds through a cloth lined colander. Drain 5 min.
Fill feta cheese forms by gently scooping the curds into the forms. You can use designated forms, or old yogurt containers with holes punched in them, or alternatively, you can leave your curds in the cloth lined colander, tie the cheese cloth and hang it from a cupboard.
Place cheese forms on a rack with a drip tray underneath. Flip cheeses in the forms every 10 min for the first hour. After this, allow cheeses to sit in forms for about 8 hours. At this time, keep your whey beside your cheese. You want it to stay at a similar temperature so that it continues to acidify at a similar rate as your cheese.
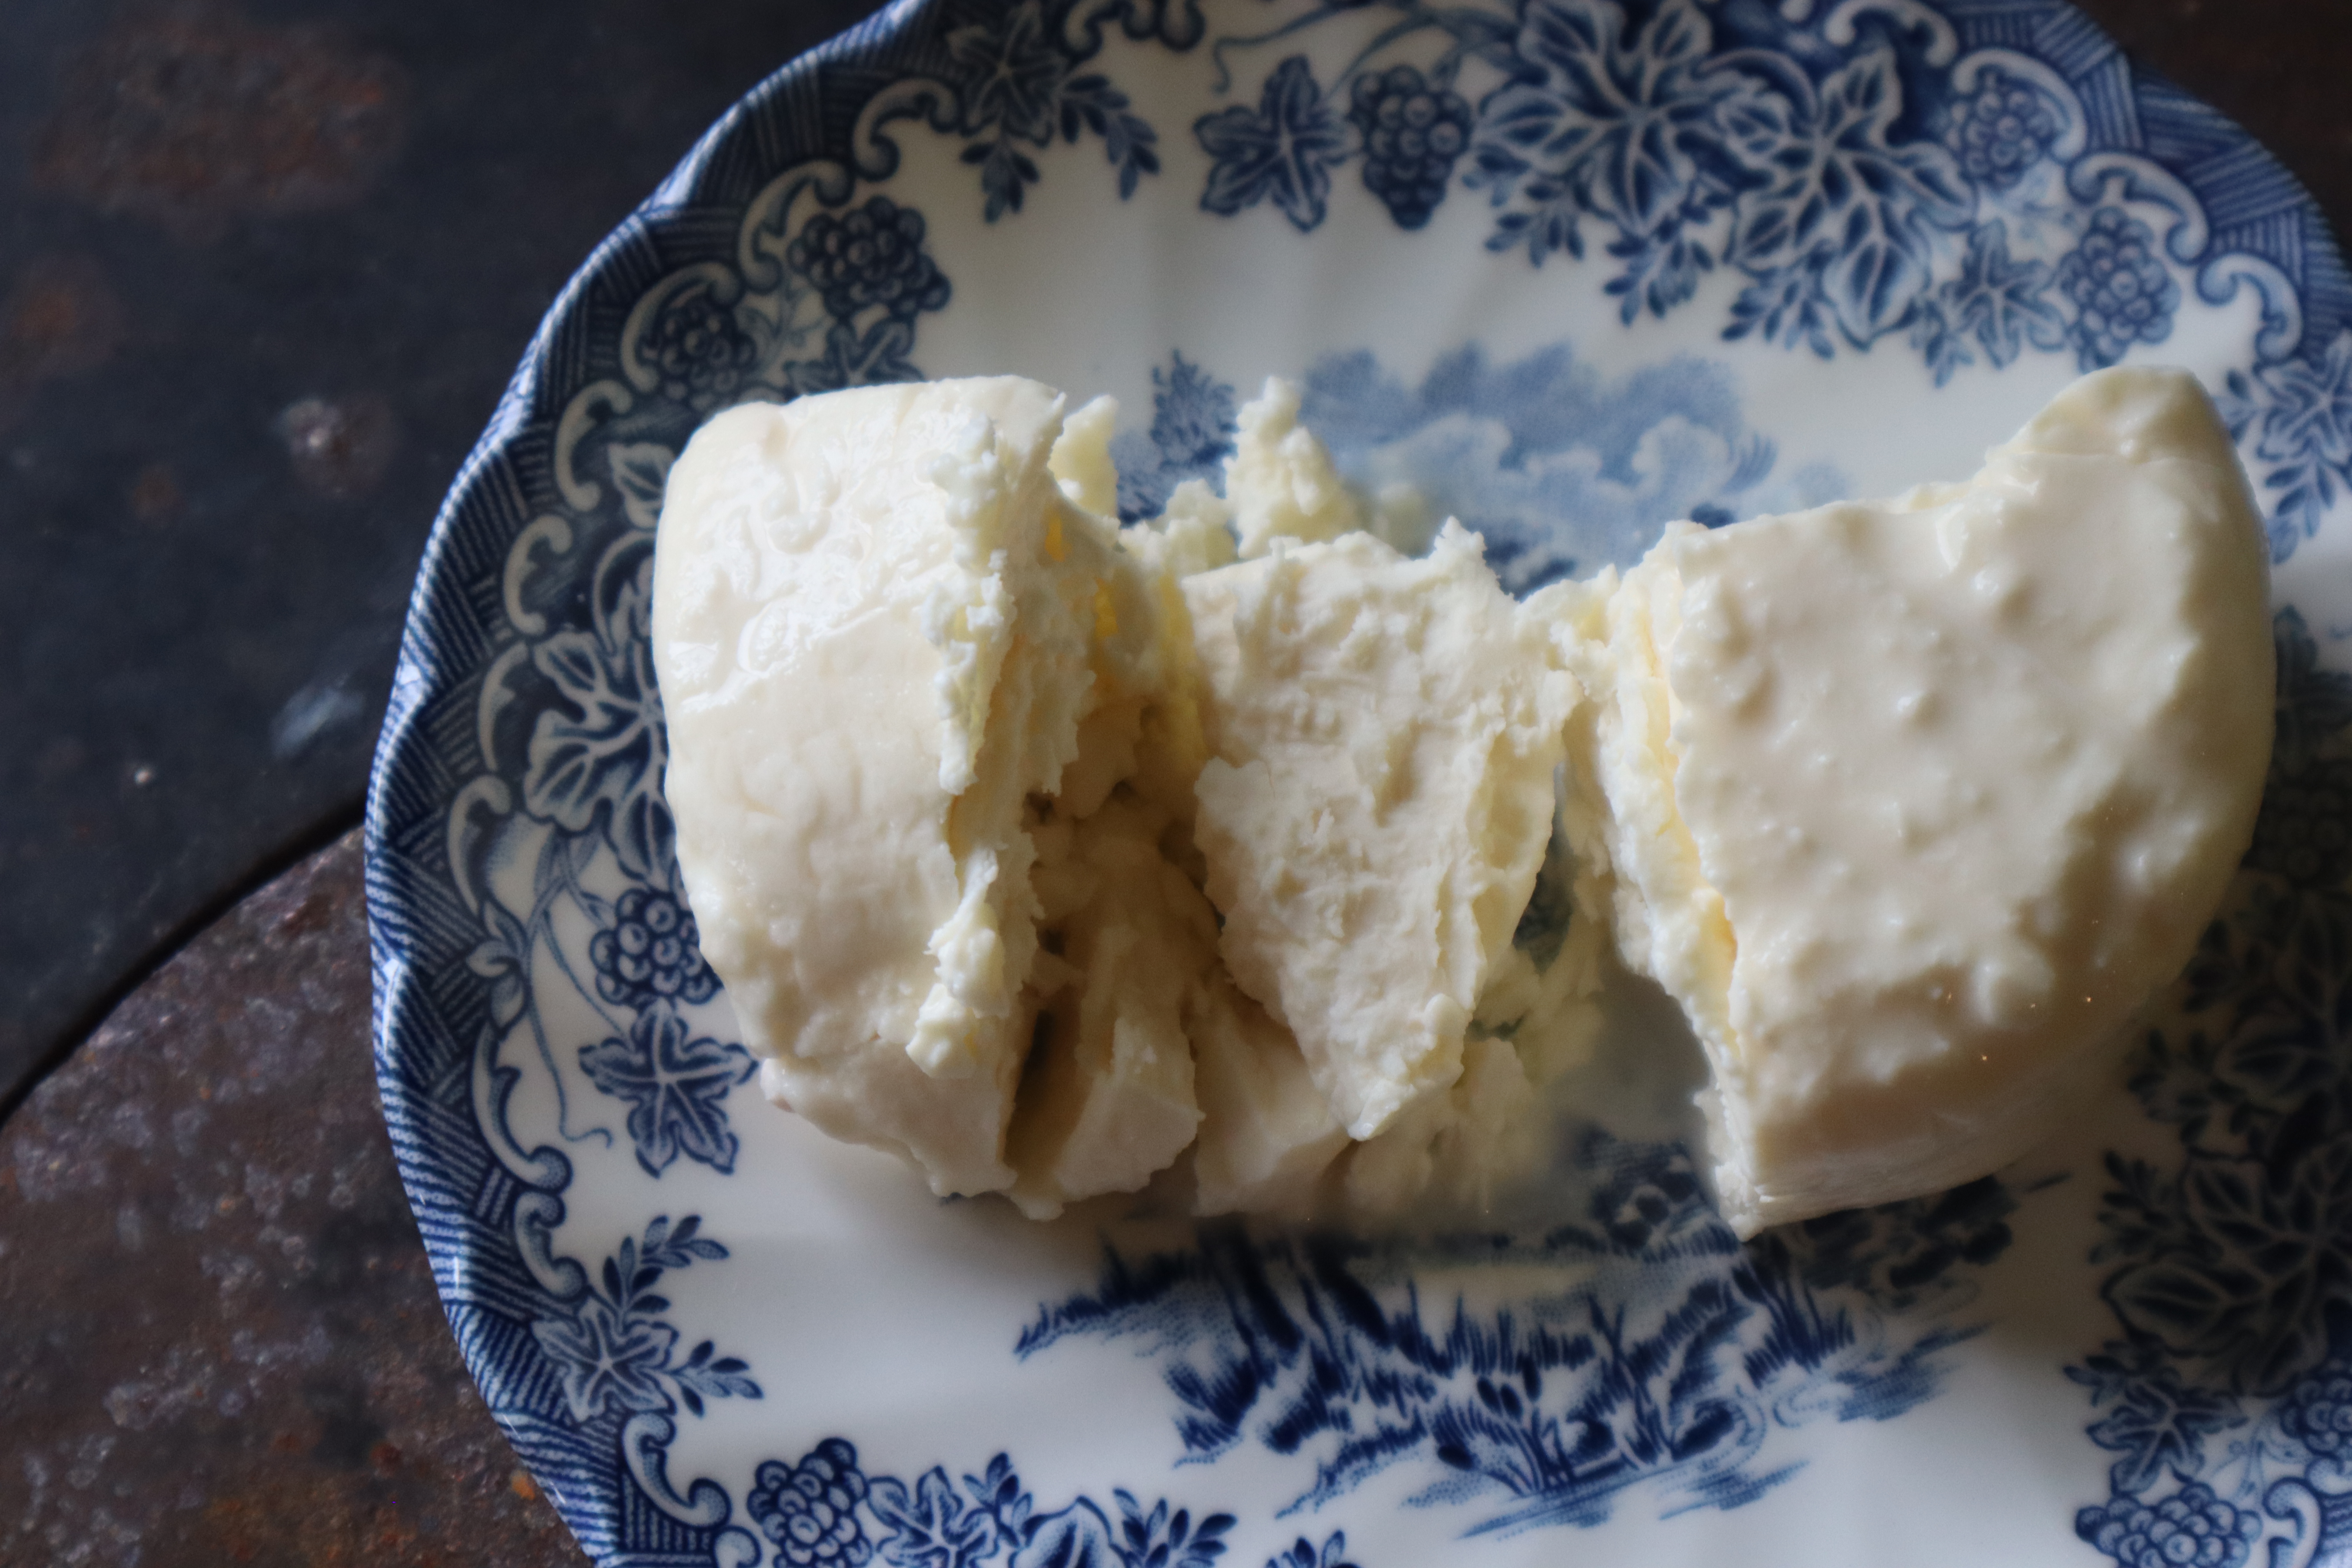
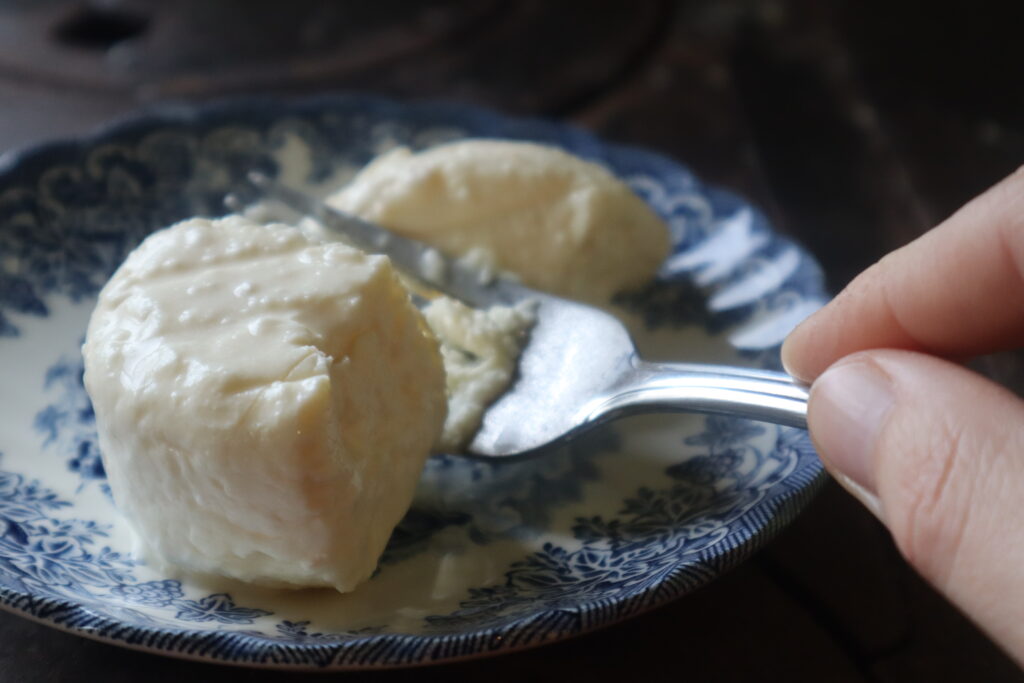
Remove cheese from the forms. If needed cut the cheeses so that they will fit in your gallon jar. Dry salt the cheeses by rubbing the entire surfaces of the cheeses with a small amount of salt. Don’t exceed 1tsp of salt per 1 lb of cheese. At this time if your cheese still feels fairly “squishy or flimsy”, place cheese back in the cheese forms so that it does not loose shape. At this time, make your whey into a salt brine. Do this by mixing 1part salt to 10 parts whey. For example, if you have 1/2 gallon of whey use approximatly 3/4 cup salt. If your whey has developed a cream skim on top, you can skim it off at this time.
Leave the cheeses to air dry on the counter (You can remove them from the cheese forms at anytime that you feel they will hold their shape). Leave them to dry until they have formed dry rinds, and are no longer “squishy”. This can take anywhere between a day to three to achieve. If it takes longer, you may notice a small amount of mold growth. Wash this off with your salt brine. If your house is hot, consider moving them to a cooler spot in the house like a basement or drying them in your cheese cave or refrigerator. To dry them in your cheese cave or refrigerator place them on a drying mat in a Tupperware container with the lid slightly ajar, this will keep them from drying out too quickly on the outside before they are dry on the inside. Again, during this time, keep your whey brine with your cheese.
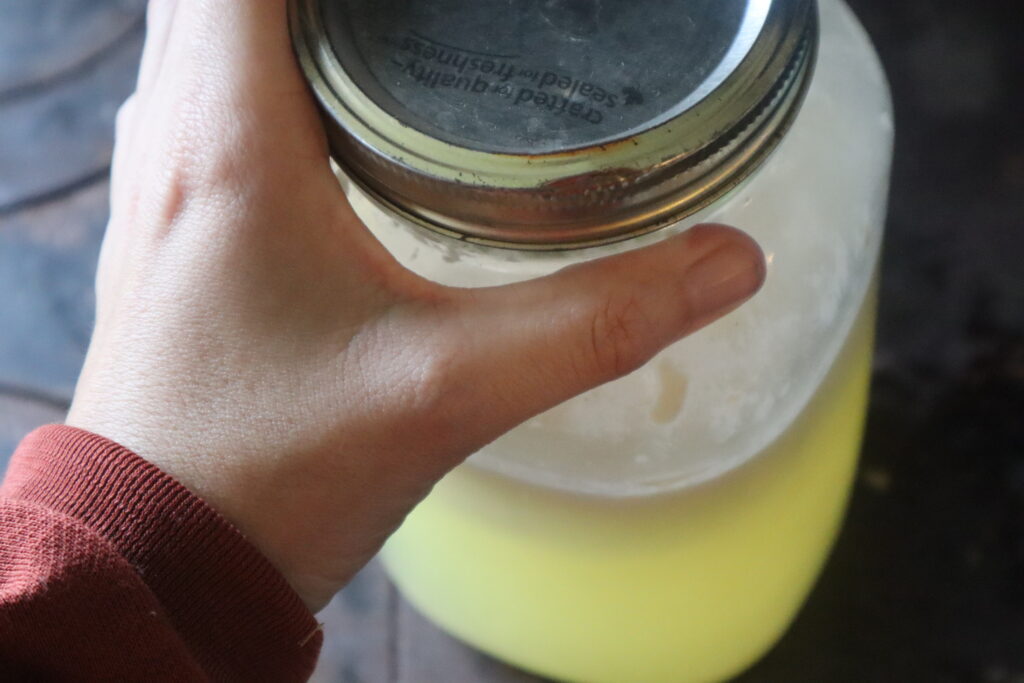
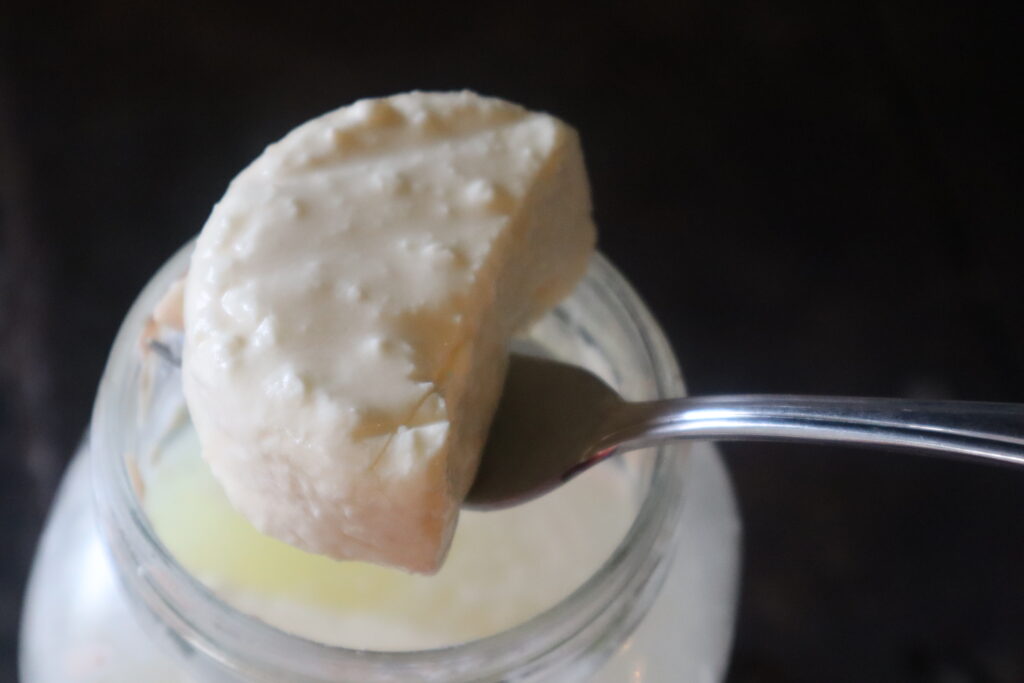
Submerge cheeses in your prepared whey brine. Ensure that your cheeses are completely covered in brine, you can use a ferment weight to keep them under the brine, or pack them in firmly so that no cheese is sticking above the brine. Move your cheese to the refrigerator or a temperature controlled aging area.
They will be ready to eat after only a few weeks, but they just get better with time! Using good quality, fresh milk. This batch will yield approximately a 1 gallon jar filled with Feta cheese.
Important notes about using pasteurized milk
- If you are using pasteurized milk, know that the finished product may be different, and that you will not achieve as high a yield.
- If using pasteurized milk, ensure that you add calcium chloride before adding the rennet into the milk. Add in 1/4 tsp of calcium chloride per gallon of milk, so for this 2.5 gallon batch a little less than 3/4tsp calcium chloride.
FAQs
Though feta is a great beginner cheese, it can sometimes give people problems. The most common problem you will come across with making feta is something called “dissolving feta” which is essentially your feta dissolving into the brine during aging or becoming “slimy”.
My feta is slimy
If your feta is slimy and is “dissolving” into the whey there are 3 common reasons for this.
- Your brine is a different acidity than your cheese. The reason I call for keeping your whey brine with your cheese the entire time during the salting and drying process is because you want your brine to be relatively the same acidity as your cheese. If it is different, it can cause your cheese to break down. If you are using a water based brine, or if you did not keep your whey brine with your cheese, you can bring your brine to a similar acidity as your cheese by adding in 1 tsp of vinagar per gallon of brine.
- Your brine does not have enough calcium chloride in it. Remember diffusion from high school science? Molecules will travel from an area of high concentration to an area of low in an attempt to make even molecules on either side. A little science comes to play in feta making too! Calcium is the glue in cheesemaking. It binds proteins together to make cheese. If the calcium content on the inside of the cheese is higher than the calcium content of the brine, diffusion will occur and calcium (or the glue of your cheese) will be pulled from the cheese into the brine. This creates dissolved feta and often starts off as a slimy cheese. The reason I use a whey brine for this recipe verses a water brine, is that whey contains calcium chloride and theoretically it should have enough in it, to prevent dissolving feta. If you are using a water brine, or you notice your whey brined cheese is beginning to become slimy, you can add 1tbsp of calcium chloride into your 1/2 gallon of brine.
- You didn’t let your cheese dry enough. If you move your cheese to the brine before it is fully dry, it can become slimy. To avoid this, only move your feta to the brine when it is dry to the touch. You can test this by sticking a paper towel onto your cheese. If it comes away dry, with no wet spots, your cheese is ready to move to your brine.
There is mold on my brine
Because we are using a whey brine for this recipe, it is normal for cream to rise to the top of the brine. To avoid mold growth on top of your brine, skim this cream off. If you notice mold growth on top of your brine, use your own discretion. I skim the mold off of the brine and continue to age my cheeses, however, if the mold has extended down into the cheese, it should be tossed out as feta is a very soft cheese and easily permeated by mold.
By keeping our cheese submerged under the whey using a ferment weight, chopsticks, or packing the cheese in firmly, you will avoid having any mold extend down into the cheese.

There is mold on my cheese
If you are drying your cheese and you notice a small amount of mold, it is ok to wash it off with a bit of your salt brine. Especially if drying is taking a significant amount of time, small amounts of mold are common.
As feta is a soft cheese, mold will easily permeate into the cheese and if you are seeing a significant amount of mold the cheese should be tossed out.
There are holes in my cheese
A few mechanical holes (meaning holes that arise during the making process of feta) are common with feta but if you are seeing shiny uniform holes throughout your cheese, a squishy feel of your finished cheese, and a expanding of the cheese, these are signs of contamination. Contamination can be caused by dangerous coliform and should not be consumed.
My cheese is too salty
If you are finding that your feta is too salty, you can reduce the salt in the whey brine by a few tbsp, as well as slightly reduce the amount of salt you are surface salting with. What you don’t want to do is reduce your salt so much that you cause the cheese to become perishable. Salt plays an important role in cheesemaking by acting as a referee in fermentation. Without it, your cheese will spoil.
If you are finding that your cheese is too salty for your taste, reduce the salt slightly in your brine but do not go below a 7% saturated brine meaning 0.7 parts salt to 10 parts whey.
Can I freeze feta?
Some people choose to freeze their feta verses aging it in a salt brine. This eliminates the risk for dissolving feta, but the trade off is that it does not allow your feta to age. Feta does become better with age, and it is a different product at 6 months verses just after making. If you choose to freeze your feta, you will still have good cheese, but it will have a milder fresh taste verses the aged version.
Freezing cheese also causes it to become more crumbly, which is actually a benefit for feta!
Can I use goat milk to make this recipe?
Yes! You can use any species of milk to make this recipe including goat, cow or sheep. When using goat and sheep milk, you will notice that the feta has a more authentic “tang” verses the cow milk version. This is due to the higher presence of an enzyme called lipase in sheep and goat milk.
Do I have to use rennet to make this cheese?
Rennet is a necessary ingredient in this recipe as it causes the milk to coagulate much quicker than if you were to use bacterial culture alone. You can buy rennet at any cheese supply website. There are many different choices for rennet such as liquid, tablet, animal, vegetable, and microbial. I like to use this tablet rennet.
Should I use mesophilic culture or clabber?
Use whatever you have on hand or whatever is easier for you. Clabber is a great option if you have a consistent source of raw milk and are looking to make your own cheesemaking culture at home.
If you are sourcing mesophilic culture you will find that there are many different choices. Mesophilic cultures are types of bacterial culture that like to thrive at cooler temperatures. They are used in cheeses like feta, cheddar, colby and gouda. I like to use this mesophilic culture for all of my low temperature cheeses.
Can I store my feta in oil?
Yes you can! After some experimenting though, I recommend you store your feta in brine as needed for eating as it does seem to spoil quicker. Feta in oil tends to last 2-3 weeks.
To make a marinated feta, add olive oil and spices to a jar with your homemade feta. Store in the refrigerator and for best results consume within a few weeks.
How many holes should I put in my homemade cheese forms?
If you are making cheese forms out of yogurt containers, poke as many holes as you can in them. A great way to make these holes is with a metal shiskabob stick, but if you don’t have one, you can punch narrow slits with a knife. The biggest thing is to punch your holes from the inside out so that the jagged edges are on the outside of your cheese form. Usually in a small yogurt container I would punch 8- 10 holes in the bottom and sporadic holes coming up the side. If you notice during draining that your cheese is more moist in one area, consider poking more holes in that spot. By flipping your cheese often during the first hour, you will avoid uneven drainage even in homemade forms.
How long will homemade feta last?
It just gets better with age! In fact I prefer eating feta that is 6 months or older.
Additional resources
- Read this blog post on how to start a clabber culture
- Watch this youtube video on how to make feta cheese
- Get my favourite book on natural cheesemaking, The art of natural cheesemaking by David Asher
- Learn to make your own cheeses using clabber as a culture in the Christmas cheeseboard ebook
- Watch this video on how to start a clabber culture
- Watch my feta tutorial in The Milkmaid Society
- Shop my favourite cheesemaking equipment here

Feta Cheese Recipe
Equipment
- Kitchen Thermometer
- A saucepan that will hold 2.5 gallons of milk
- Large spoon and knife
- Measuring cups and spoons
- Cheese Cloth
- Colander
- Feta cheese forms- You can easily make these at home by poking holes in old yogurt containers. Don’t have any yogurt containers? Simply drain your feta in a cheese cloth hung from the cupboard.
- Drying rack overtop of a pan- This is just a fancy word for a cookie rack.
- Gallon jar- Old pickle jars work great for this. Pro hack- To get the pickle smell out, set the jars and lids out in the sun for several days.
Materials
- 2.5 Gallons Raw Milk If using pasteurized milk, see notes.
- 1/2 tsp Freeze Dried Mesophilic Culture or 3/4 cup well fed Clabber
- Rennet Use your package directions for how much to use
- Fine Ground Salt Be sure their are no additives
Instructions
- Warm milk to 90F
- Sprinkle Freeze dried mesophilic culture over the surface of the milk. Let it rehydrate for 5 min before gently incorporating it into the milk with an up and down stirring motion. If you are using clabber culture instead of mesophilic culture, whisk or stir the clabber culture into your milk to incorporate. To avoid clumps, I like to whisk my clabber culture into several cups of liquid milk before incorporating it into the entire pot.
- Dilute Rennet in 1/4 cup cool water. Incorporate gently, but thoroughly into milk.
- Let sit covered for 1 hour until you achieve a clean break. A clean break is when you stick your finger under the surface of the curds, and gently lift upwards. The milk should split at the surface, in a “clean break”.
- Once you achieve a clean break, cut a grid of 3/4 inch cubes. This means cut horizontally, vertically, and up and down so that your curds are 3/4 inch cubes. Let them sit for 5 min so that they “firm up”.
- Stir curds gently for 20-30 min or until they have shrunk slightly, and when pressed between your fingers, they break apart, but have a slight firmness, similar to a poached egg.
- Let curds settle to the bottom of your pot. Scoop off the whey and reserve about half a gallon for a salt brine (I always reserve a little bit more just to be safe). An important step in preventing something called “dissolving feta”, is to treat your whey the exact same as you treat your cheese. This means you want it to live beside your cheese at whatever temperature your cheese is, and you want to salt it at the same time that you salt your cheese.
- Drain remaining curds through a cloth lined colander. Drain 5 min.
- Fill feta cheese forms by gently scooping the curds into the forms. You can use designated forms, or old yogurt containers with holes punched in them, or alternatively, you can leave your curds in the cloth lined colander, tie the cheese cloth and hang it from a cupboard.
- Place cheese forms on a rack with a drip tray underneath. Flip cheeses in the forms every 10 min for the first hour. After this, allow cheeses to sit in forms for about 8 hours. At this time, keep your whey beside your cheese. You want it to stay at a similar temperature so that it continues to acidify at a similar rate as your cheese.
- Remove cheese from the forms. If needed cut the cheeses so that they will fit in your gallon jar. Dry salt the cheeses by rubbing the entire surfaces of the cheeses with a small amount of salt. Don’t exceed 1tsp of salt per 1 lb of cheese. At this time if your cheese still feels fairly “squishy or flimsy”, place cheese back in the cheese forms so that it does not loose shape. At this time, make your whey into a salt brine. Do this by mixing 1part salt to 10 parts whey. For example, if you have 1/2 gallon of whey use approximatly 3/4 cup salt. If your whey has developed a cream skim on top, you can skim it off at this time.
- Leave the cheeses to air dry on the counter (You can remove them from the cheese forms at anytime that you feel they will hold their shape). Leave them to dry until they have formed dry rinds, and are no longer “squishy”. This can take anywhere between a day to three to achieve. If it takes longer, you may notice a small amount of mold growth. Wash this off with your salt brine. If your house is hot, consider moving them to a cooler spot in the house like a basement or drying them in your cheese cave or refrigerator. To dry them in your cheese cave or refrigerator place them on a drying mat in a Tupperware container with the lid slightly ajar, this will keep them from drying out too quickly on the outside before they are dry on the inside. Again, during this time, keep your whey brine with your cheese.
- Submerge cheeses in your prepared whey brine. Ensure that your cheeses are completely covered in brine, you can use a ferment weight to keep them under the brine, or pack them in firmly so that no cheese is sticking above the brine. Move your cheese to the refrigerator or a temperature controlled aging area.
- They will be ready to eat after only a few weeks, but they just get better with time! Using good quality, fresh milk. This batch will yield approximately a 1 gallon jar filled with Feta cheese.
I made my feta a month ago and only now noticed the note about ensuring every piece is submerged.. My cheese looks, feels and smells fine, no mould on the top. It’s hard, solid (has no holes), crumbly and slightly tangy! However, the top chunk was sticking out of the brine slightly. My brine does have some cream on top, but it also looks fine.
Should I toss the top chunk to the chickens and only eat the other pieces that were 100% submerged? Or should I just assume it’s safe since my fridge is nice and cold?
Wwyd?
“yield approximately a 1 gallon jar filled with Feta cheese” – this tells me nothing, sorry. Can you tell please yield in grams/ounces/pounds?
Hi
I have just had my first attempt at making feta using a clabber culture. The curds are floating (after cutting and stirring) not sinking? Previously I have made it using a culture powder and they always sunk within minutes. I have read floating curds could mean EColi is present? Or do I just need to wait longer? Raw milk used 2days old. Should I throw it out or can I test some way.
I’m sorry floating curds mean contamination. Clabber culture should act the same as FD during the cheesemaking process.
Thank you for this! Looking forward to giving it a try! This is my first visit to your site, I found you through a homesteading email newsletter and I am excited to poke around!
Thank you for this recipe!
I’m letting my feta dry right now, but the bottom is significantly wetter than the other edges. Should I be flipping it on the drying rack?
How might this be done differently with goats milk?
I made this recipe using my sheep milk i reduced the rennet by 10/15% it turned out beautifully. Thankyou so much for this wonderful recipe.
My feta went slimy, is there any way to save it?